
Mac Classic Pt. 2 - This is Fine

Pailhead - I Will Refuse
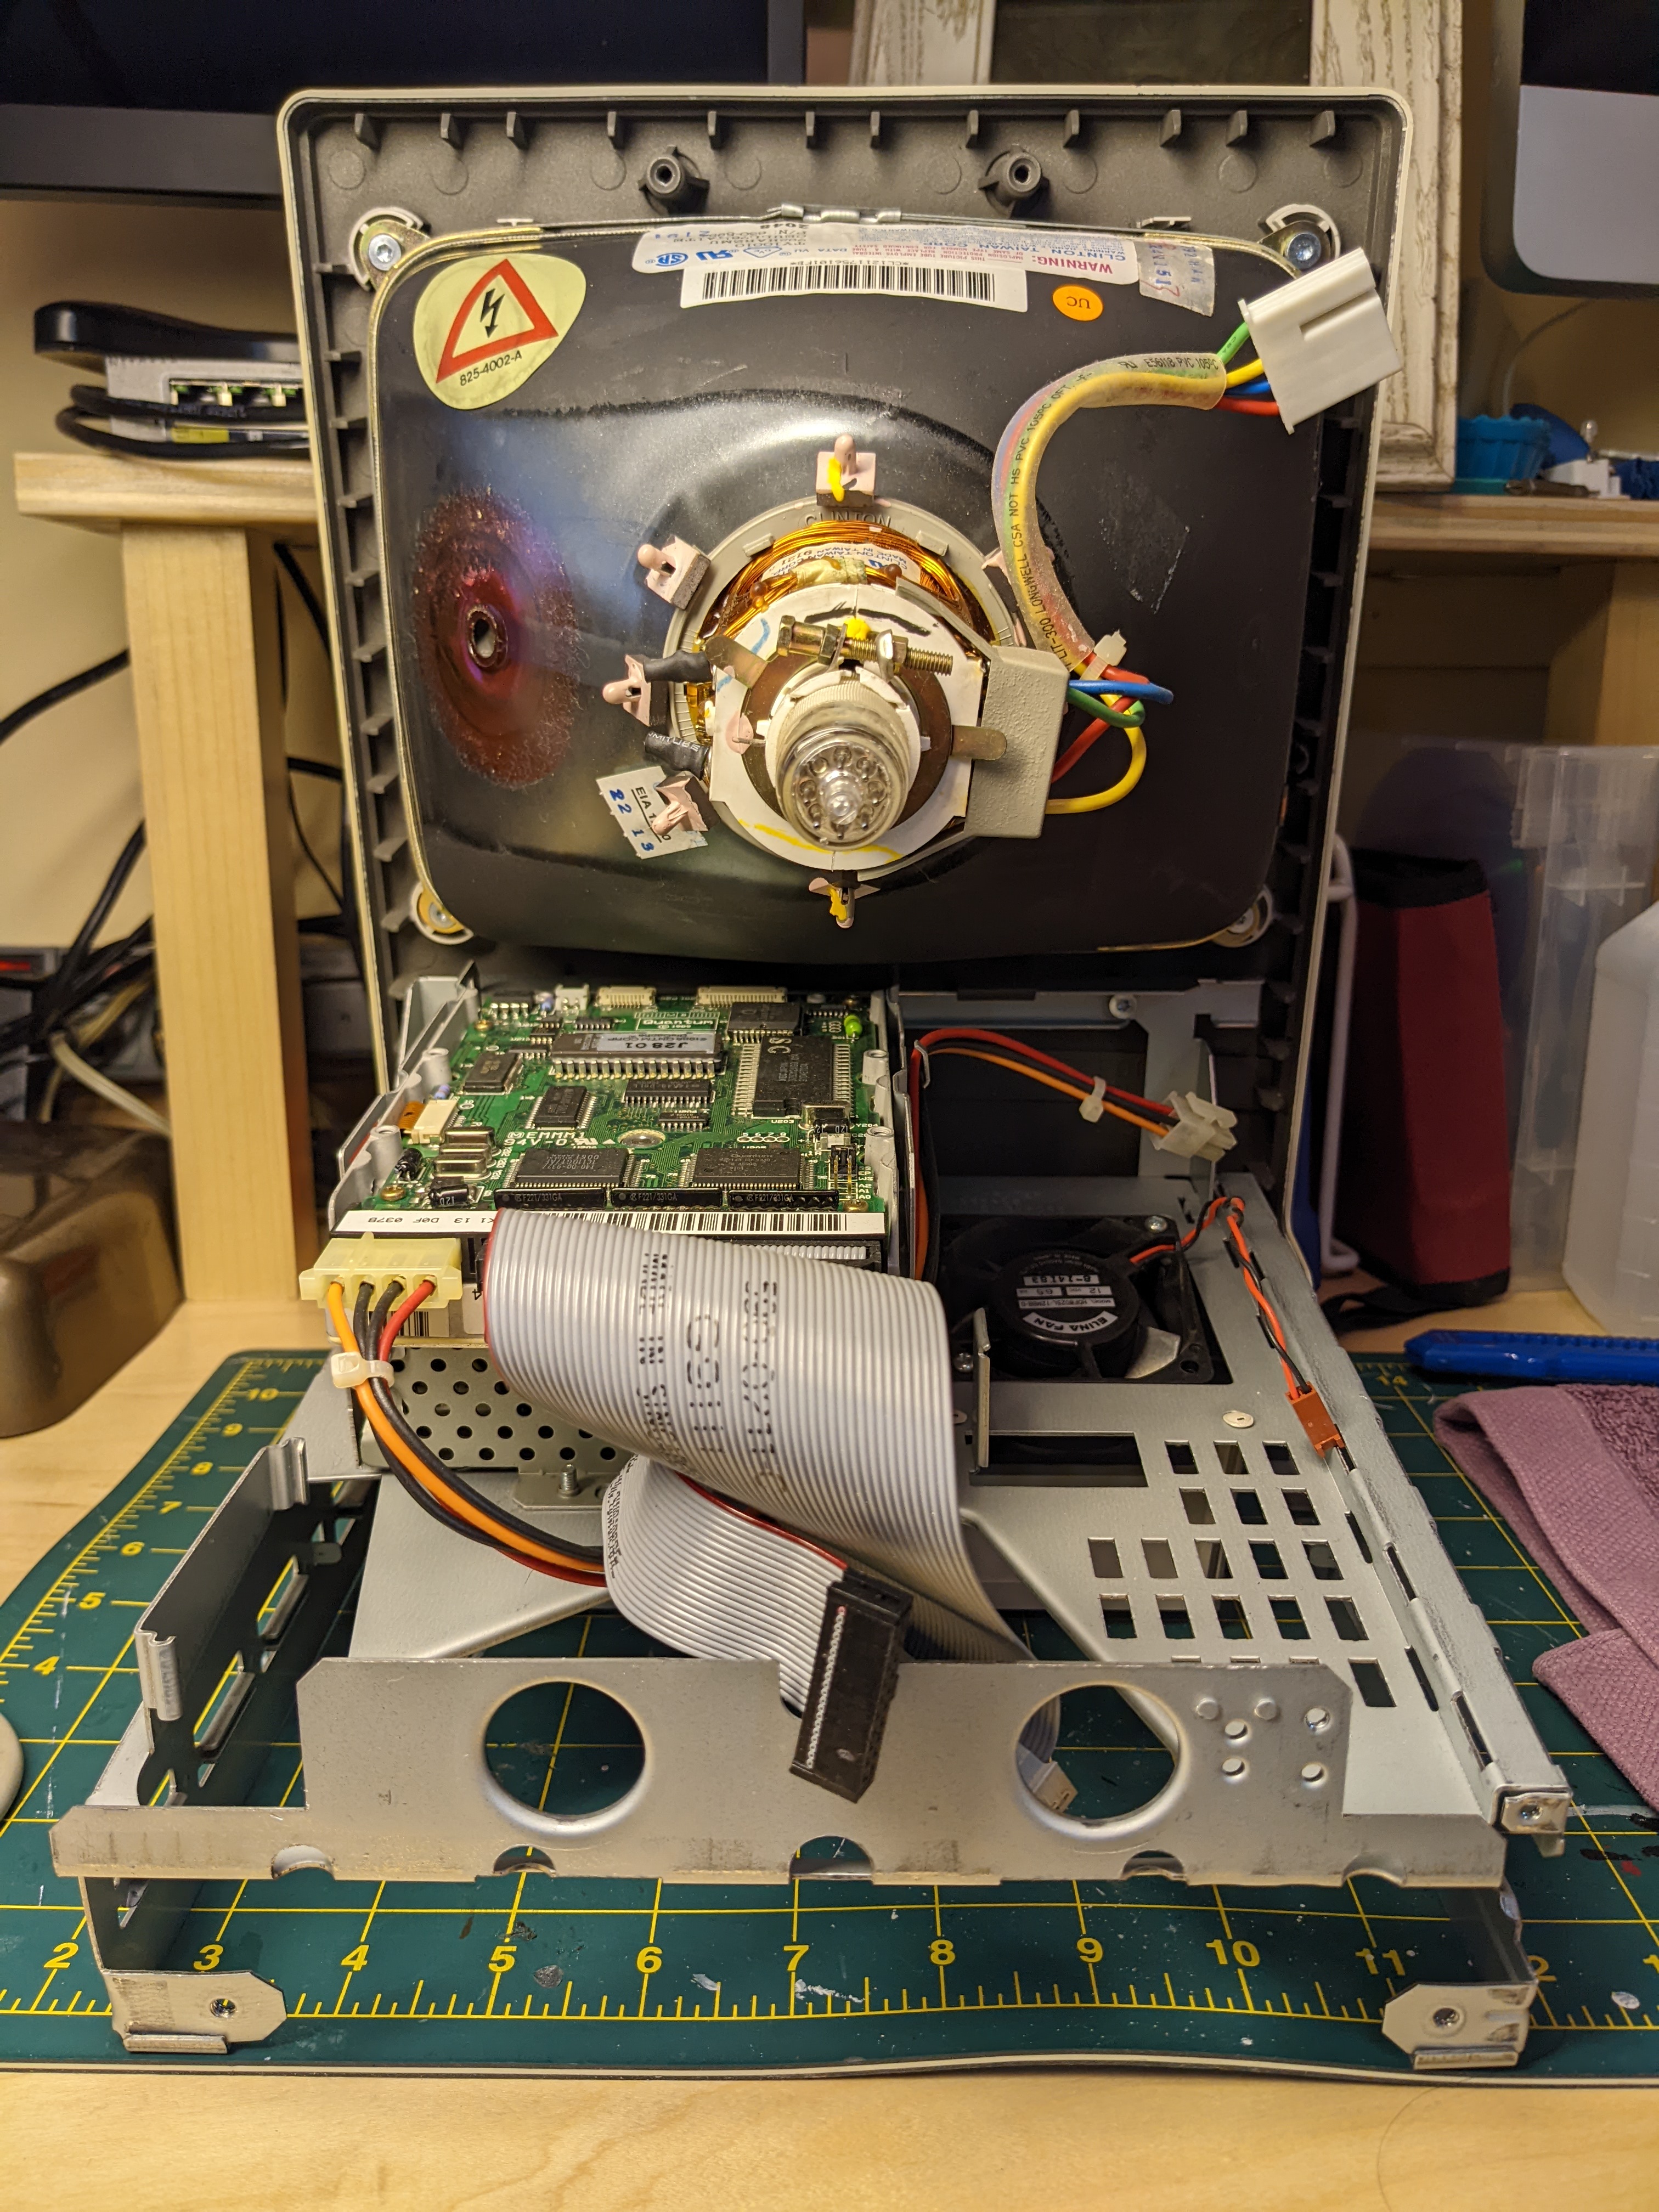
Note: I say "We" a lot. Natalie has been doing at least as much of this work as me. She has a whole method that she likes for the tantalum caps so she pretty much installed all of those. She even discharged the CRT. We learned later that the Classic seems to bleed the CRT automatically which is nice. I'm still sticking a screwdriver back there every time though just to make sure.
Good and bad news on the Mac Classic front.
If you read in part one, we over-paid a princely sum for a Mac which "Works as intended", but which should really have been "For parts or repair" for 1/3 what we paid.
So I'm personally beholden to make this fucker run regardless of personal cost in blood or treasure at this point.
"Rookies do very tidy job and rightfully feel pleased"
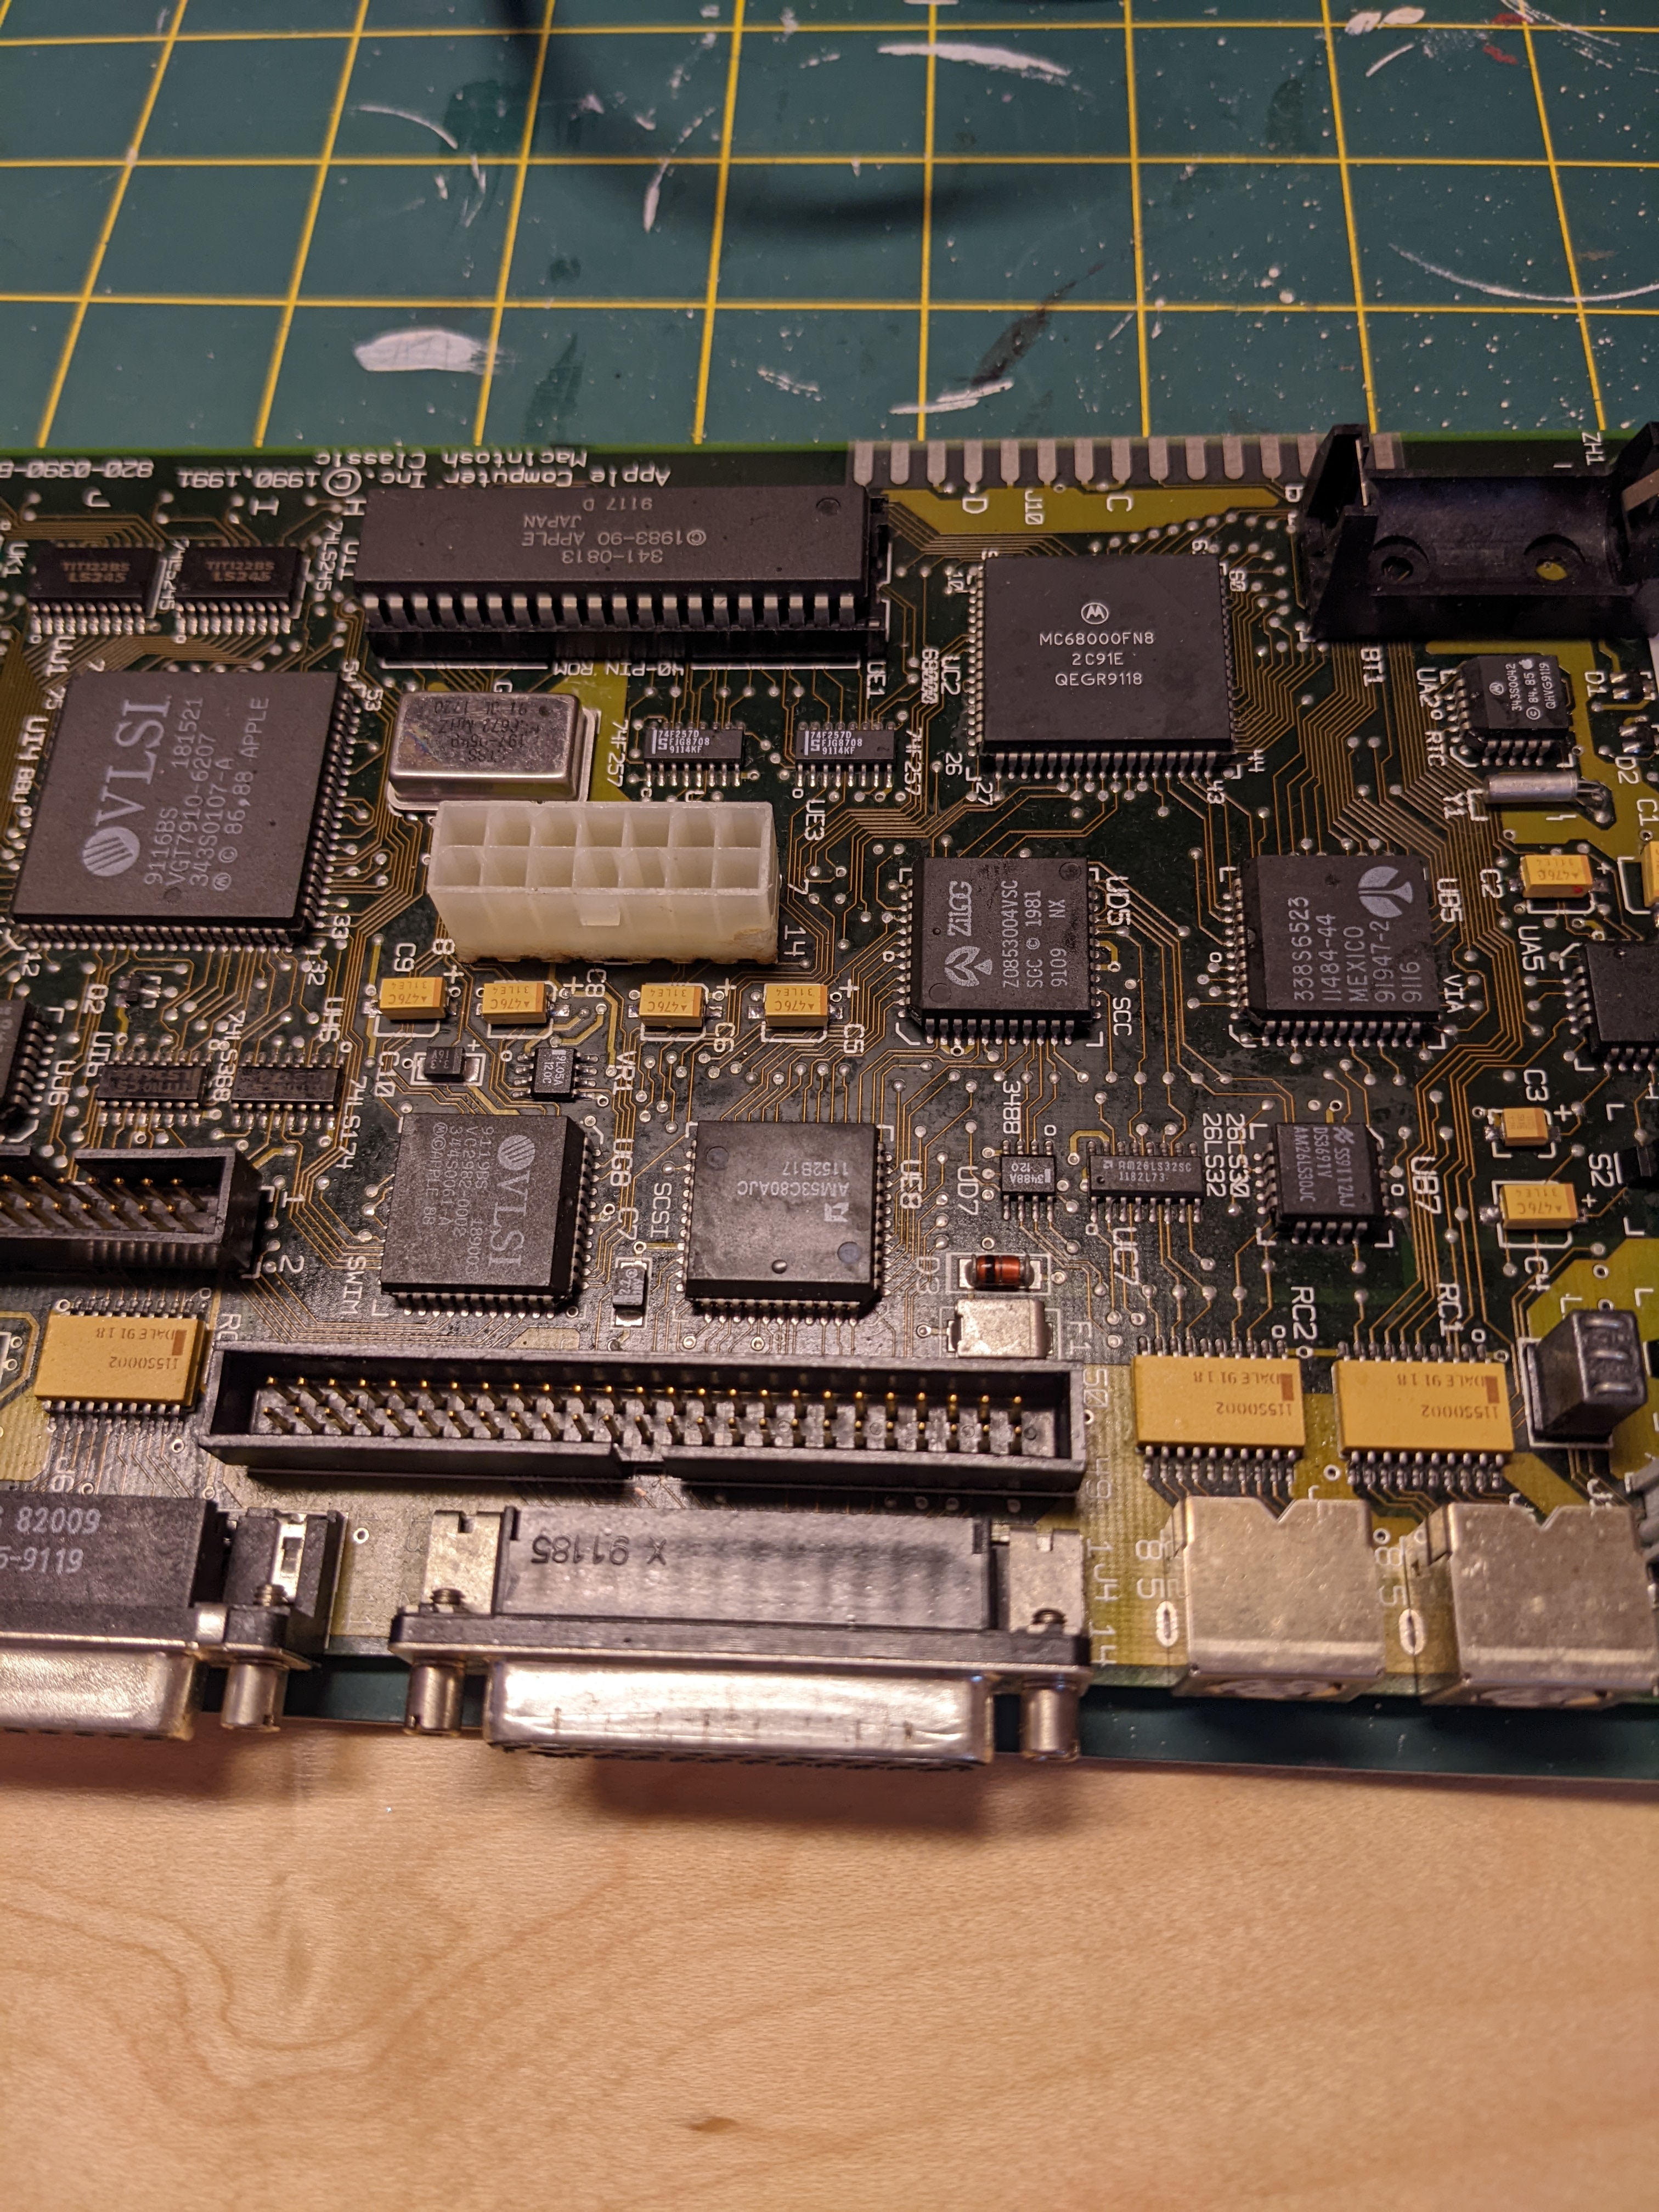
We recapped the motherboard on the Mac Classic. We got a heat gun, generous with the tape all around to make sure we didn't mess up any other components, and quickly and easily got the old parts off, we cleaned the pads up with solder wick, tinned them with new solder and put in the replacement tantalum caps, applying a bit of flux and cleaning regularly along the way. No damaged pads, everything went extremely smoothly regardless of which of us held the iron. Natalie really did most of the installation of the new parts.
Before:
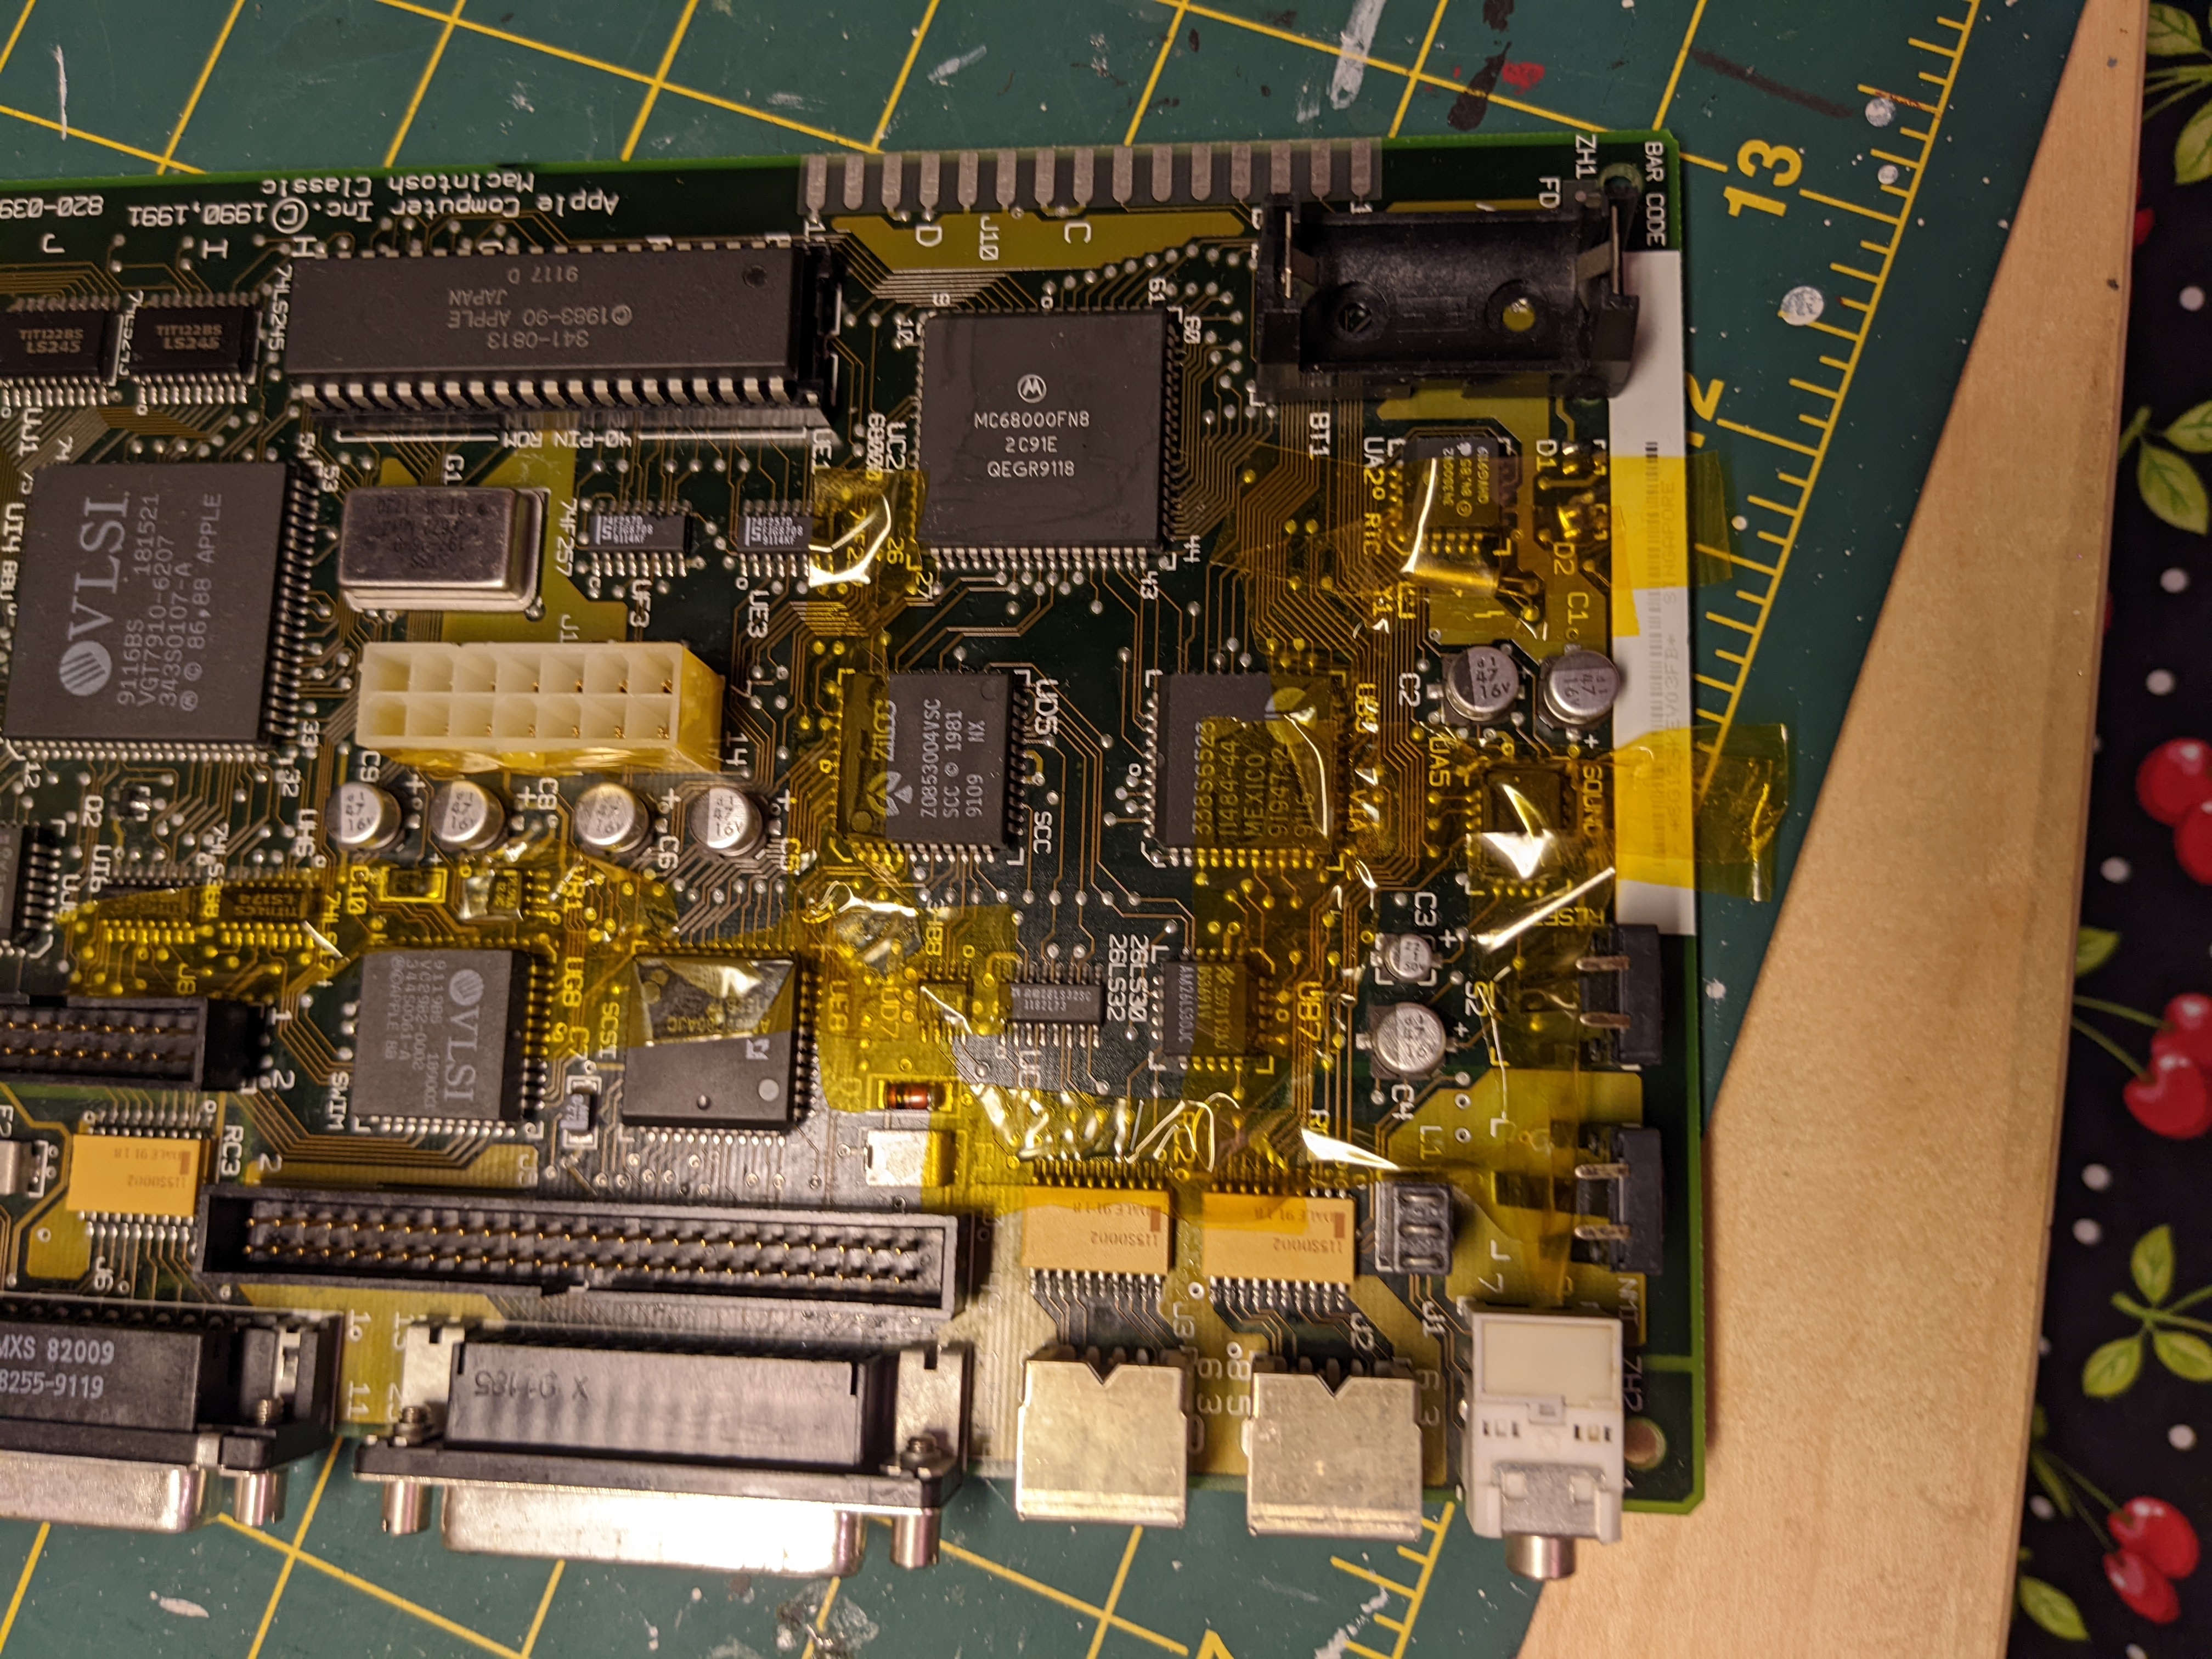
After:
"Rookie makes Rookie Mistake"
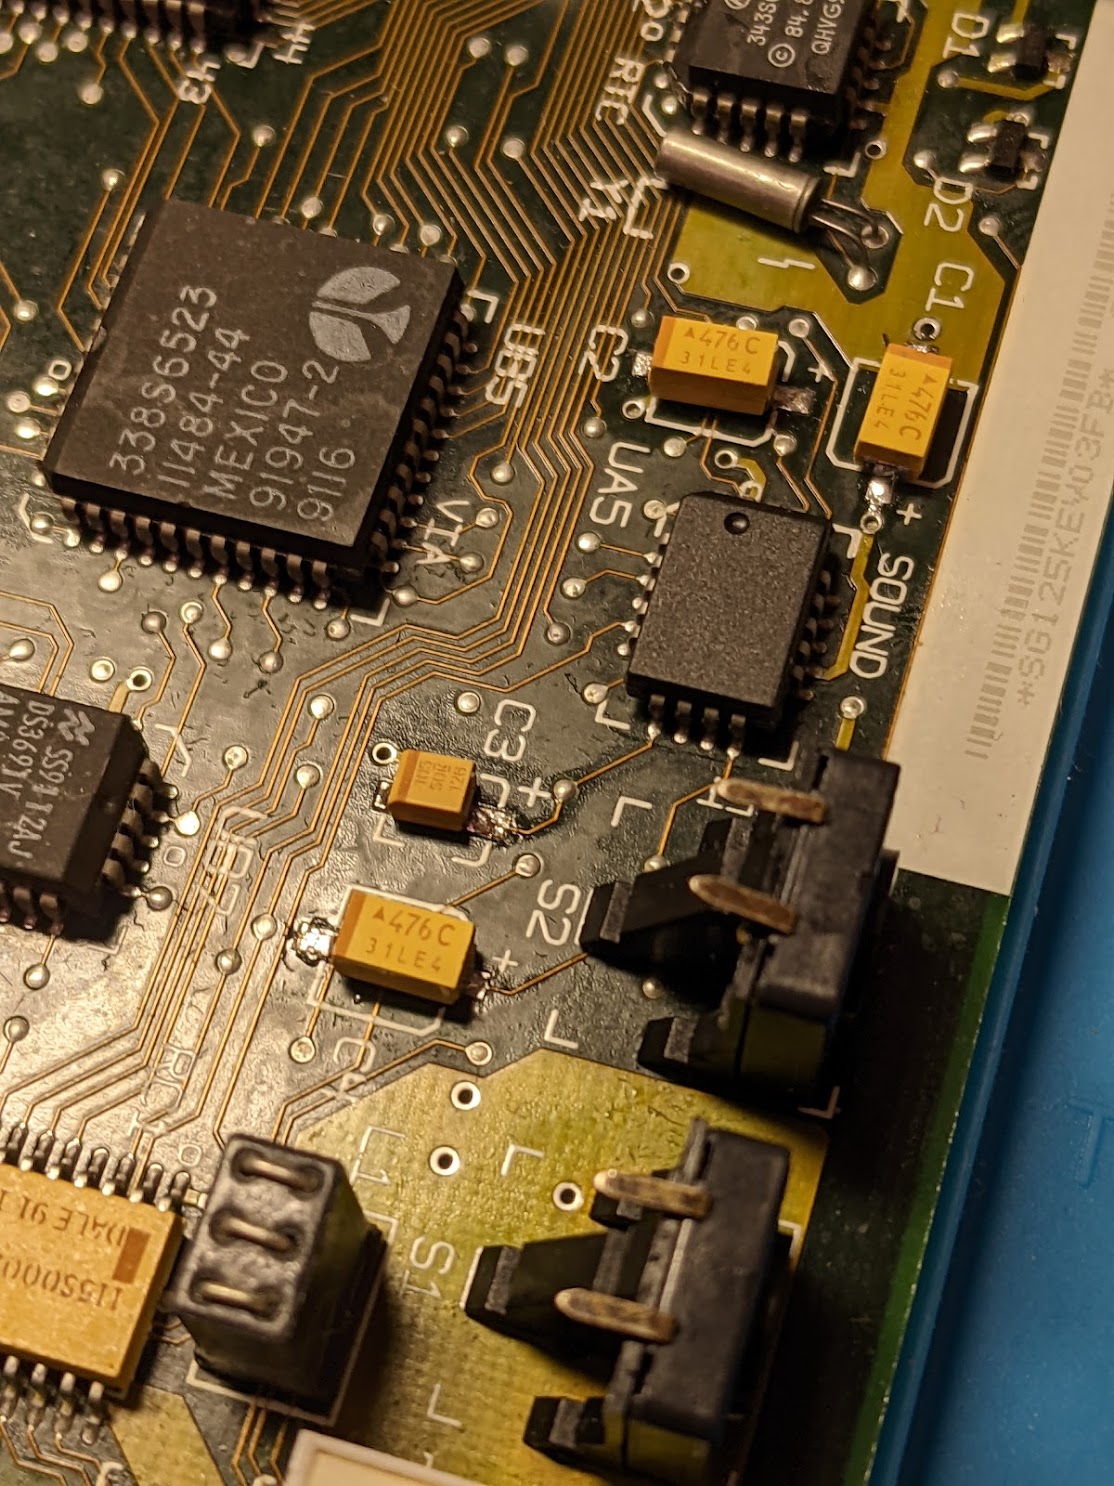
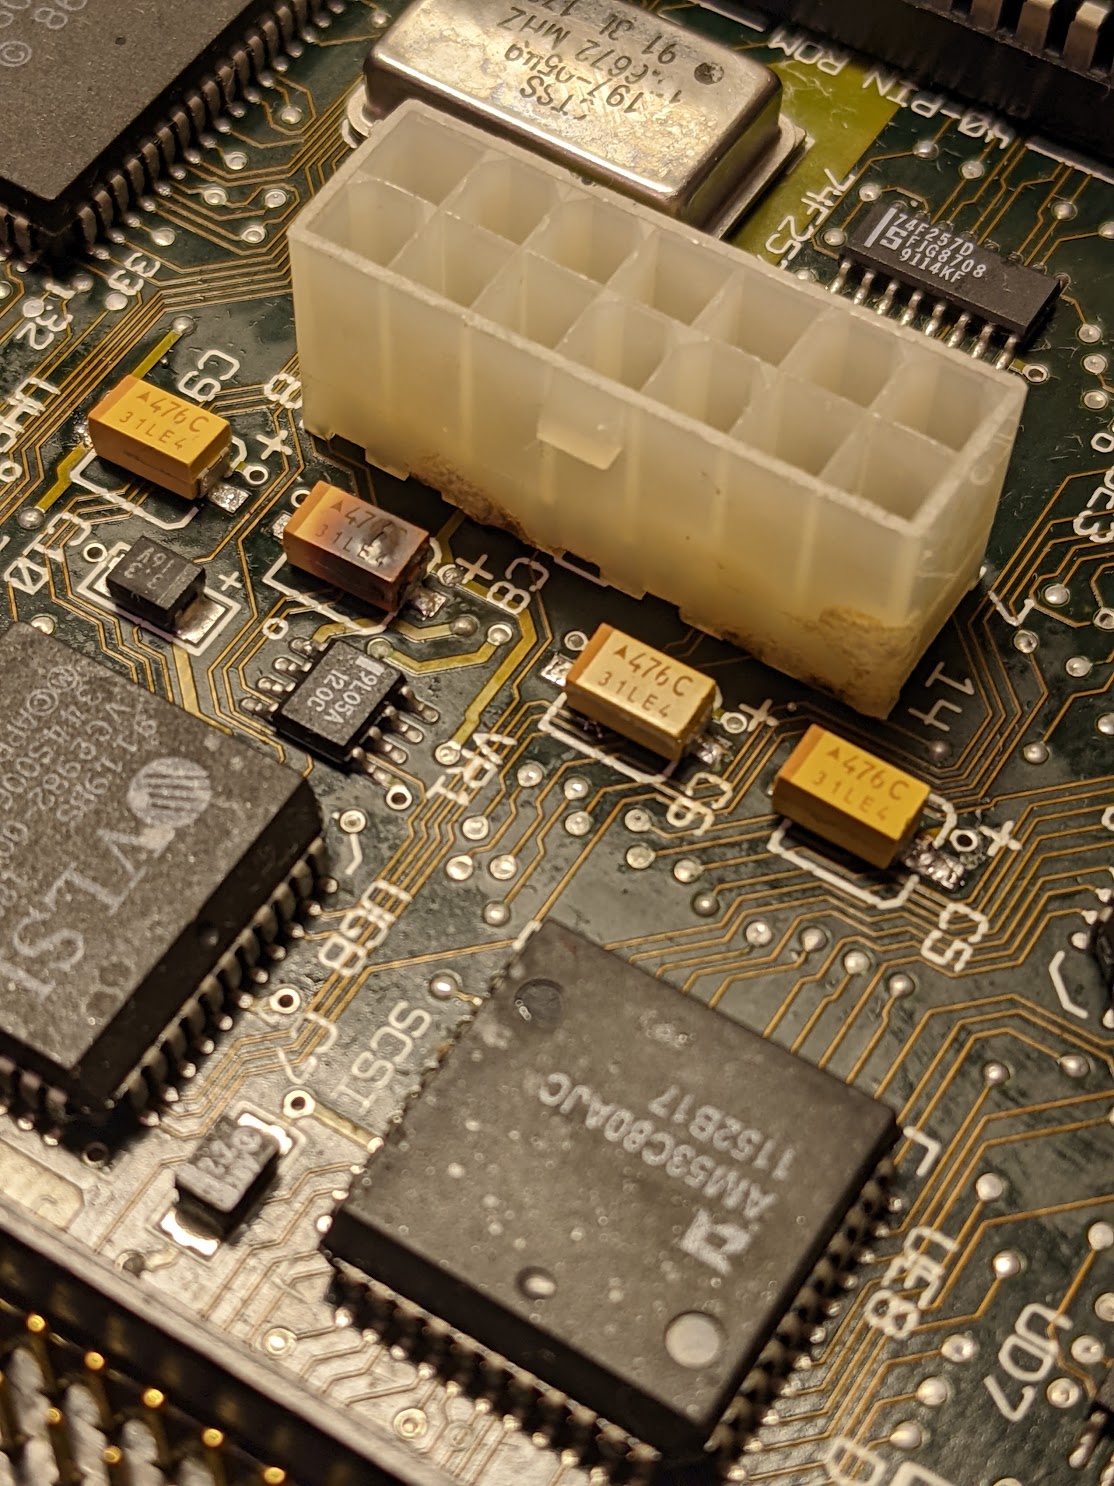
The eagle-eyed among you already see why my office smelled like shit all day last Saturday. Of course, tantalums don't note polarity the same way any electrolytic I've dealt with has. So we installed them all backwards.
I know I have seen at least one person mention that while doing a recap and replacing electrolytics with tantalums. In fact, in the box from the company we ordered the replacements from:
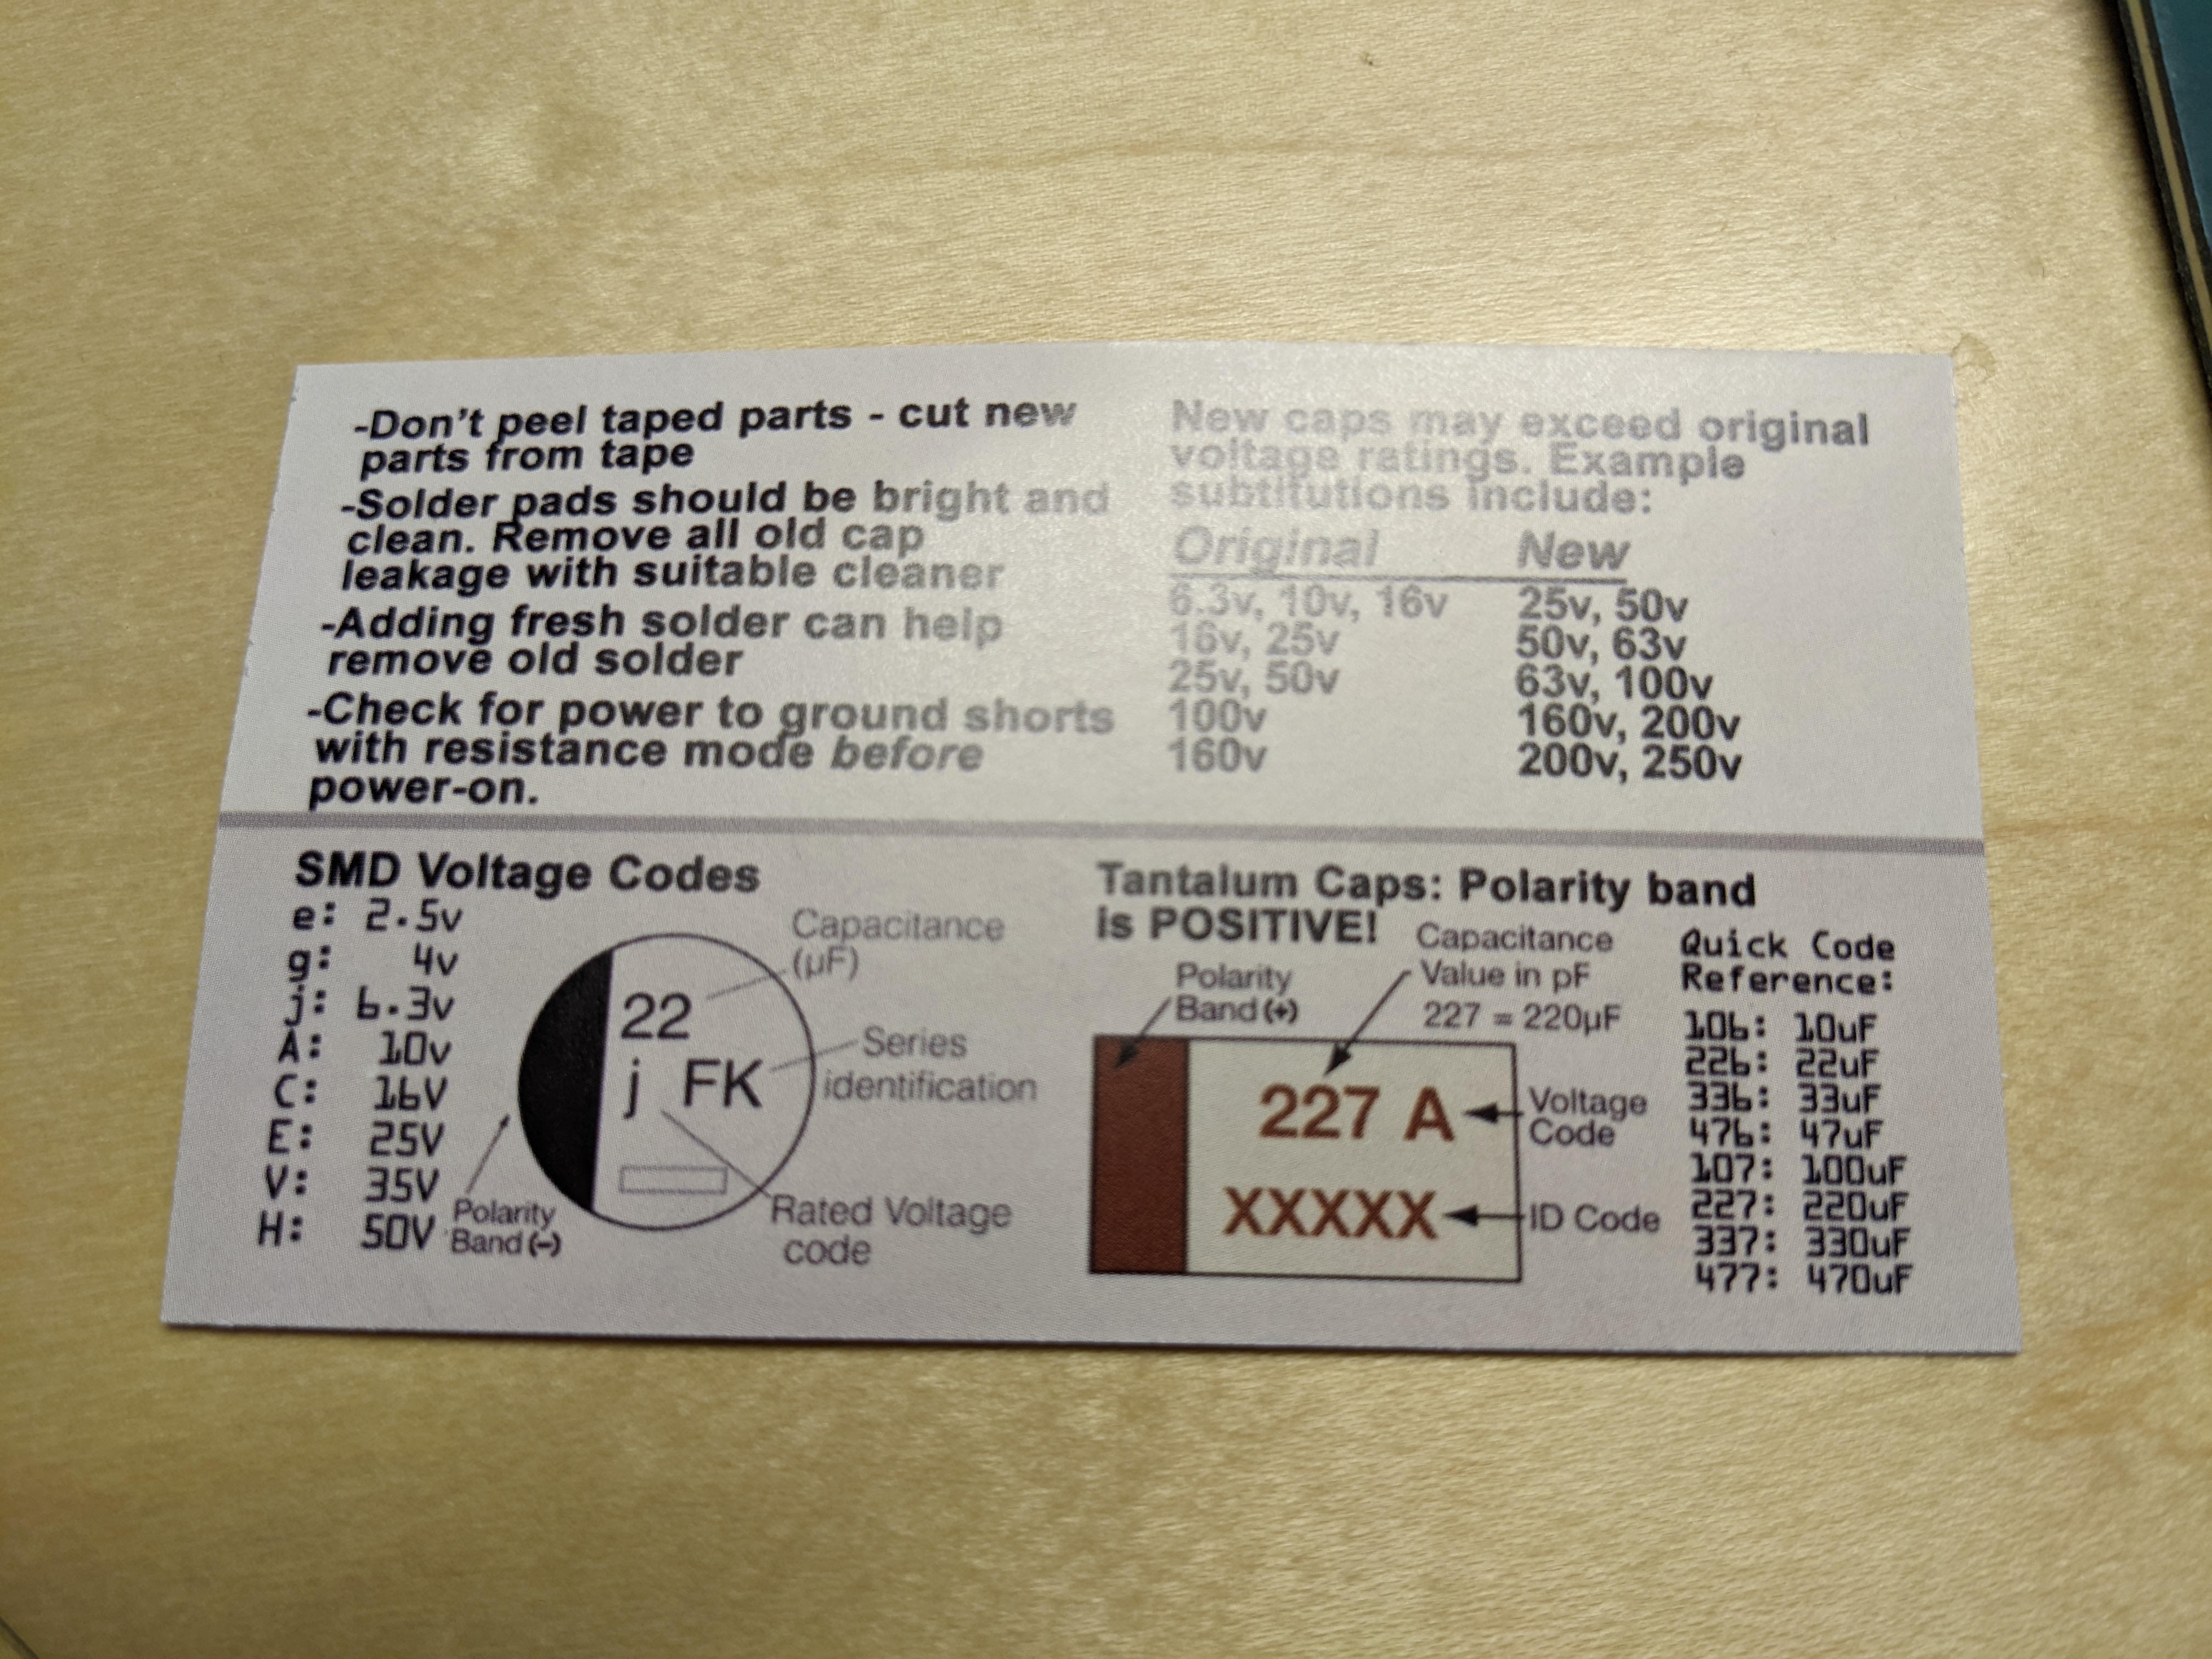
So it's not like there weren't ample people trying to get this information into my head. Oh well, happens. Here's the before & after, after the second recap:
I also took the cardboard shield off the high voltage board and saw sticky burnt electrolyte gack on the back of the board. That gack was the smell that took this machine beyond just "nicotine soaked" when you turned it on.
We've removed the high voltage board and will re-cap that in Part 3.
I'm in no position to recommend the hot air station we got, but it was just "not quite the cheapest one on Amazon". Came with some extras like a pair of side cutters and a couple pairs of tweezers, so that was helpful.
- xrayspx's blog
- Log in to post comments
- 1768 reads