Sat 7/18:
I think I am making a huge mistake using enterprise switches. The heat coming off that thing has been a real problem! I was just sitting there dripping with that office over 90F. I could swap it for a 24-port Netgear but I don't wnat to lose the serial and logs and stuff I use. It's just like web gui only which isn't great for me.
I'm pretty sure that switch is "THE" source of excess heat in this room.
It just occurred to me that I never finished the video and walk through of the cable management project I did a couple months ago. It came out great and hasn't been a problem since I did it. Honestly I've been on other projects, but I know that the next thing I do with that retro-gear is going to be a breeze.
As you can see, the Checkmate spins right around and it's super easy to get at everything without putting any strain on any of the ports or stretching any cables. It's never going to win the tidiness olympics, but it's all safe and convenient and well managed. I do like some organization porn though, and this is definitely that.
Big thanks again to Checkmate for making exactly the right product for my extremely specific use case and tying this whole collection of stuff together in one easy to navigate package.
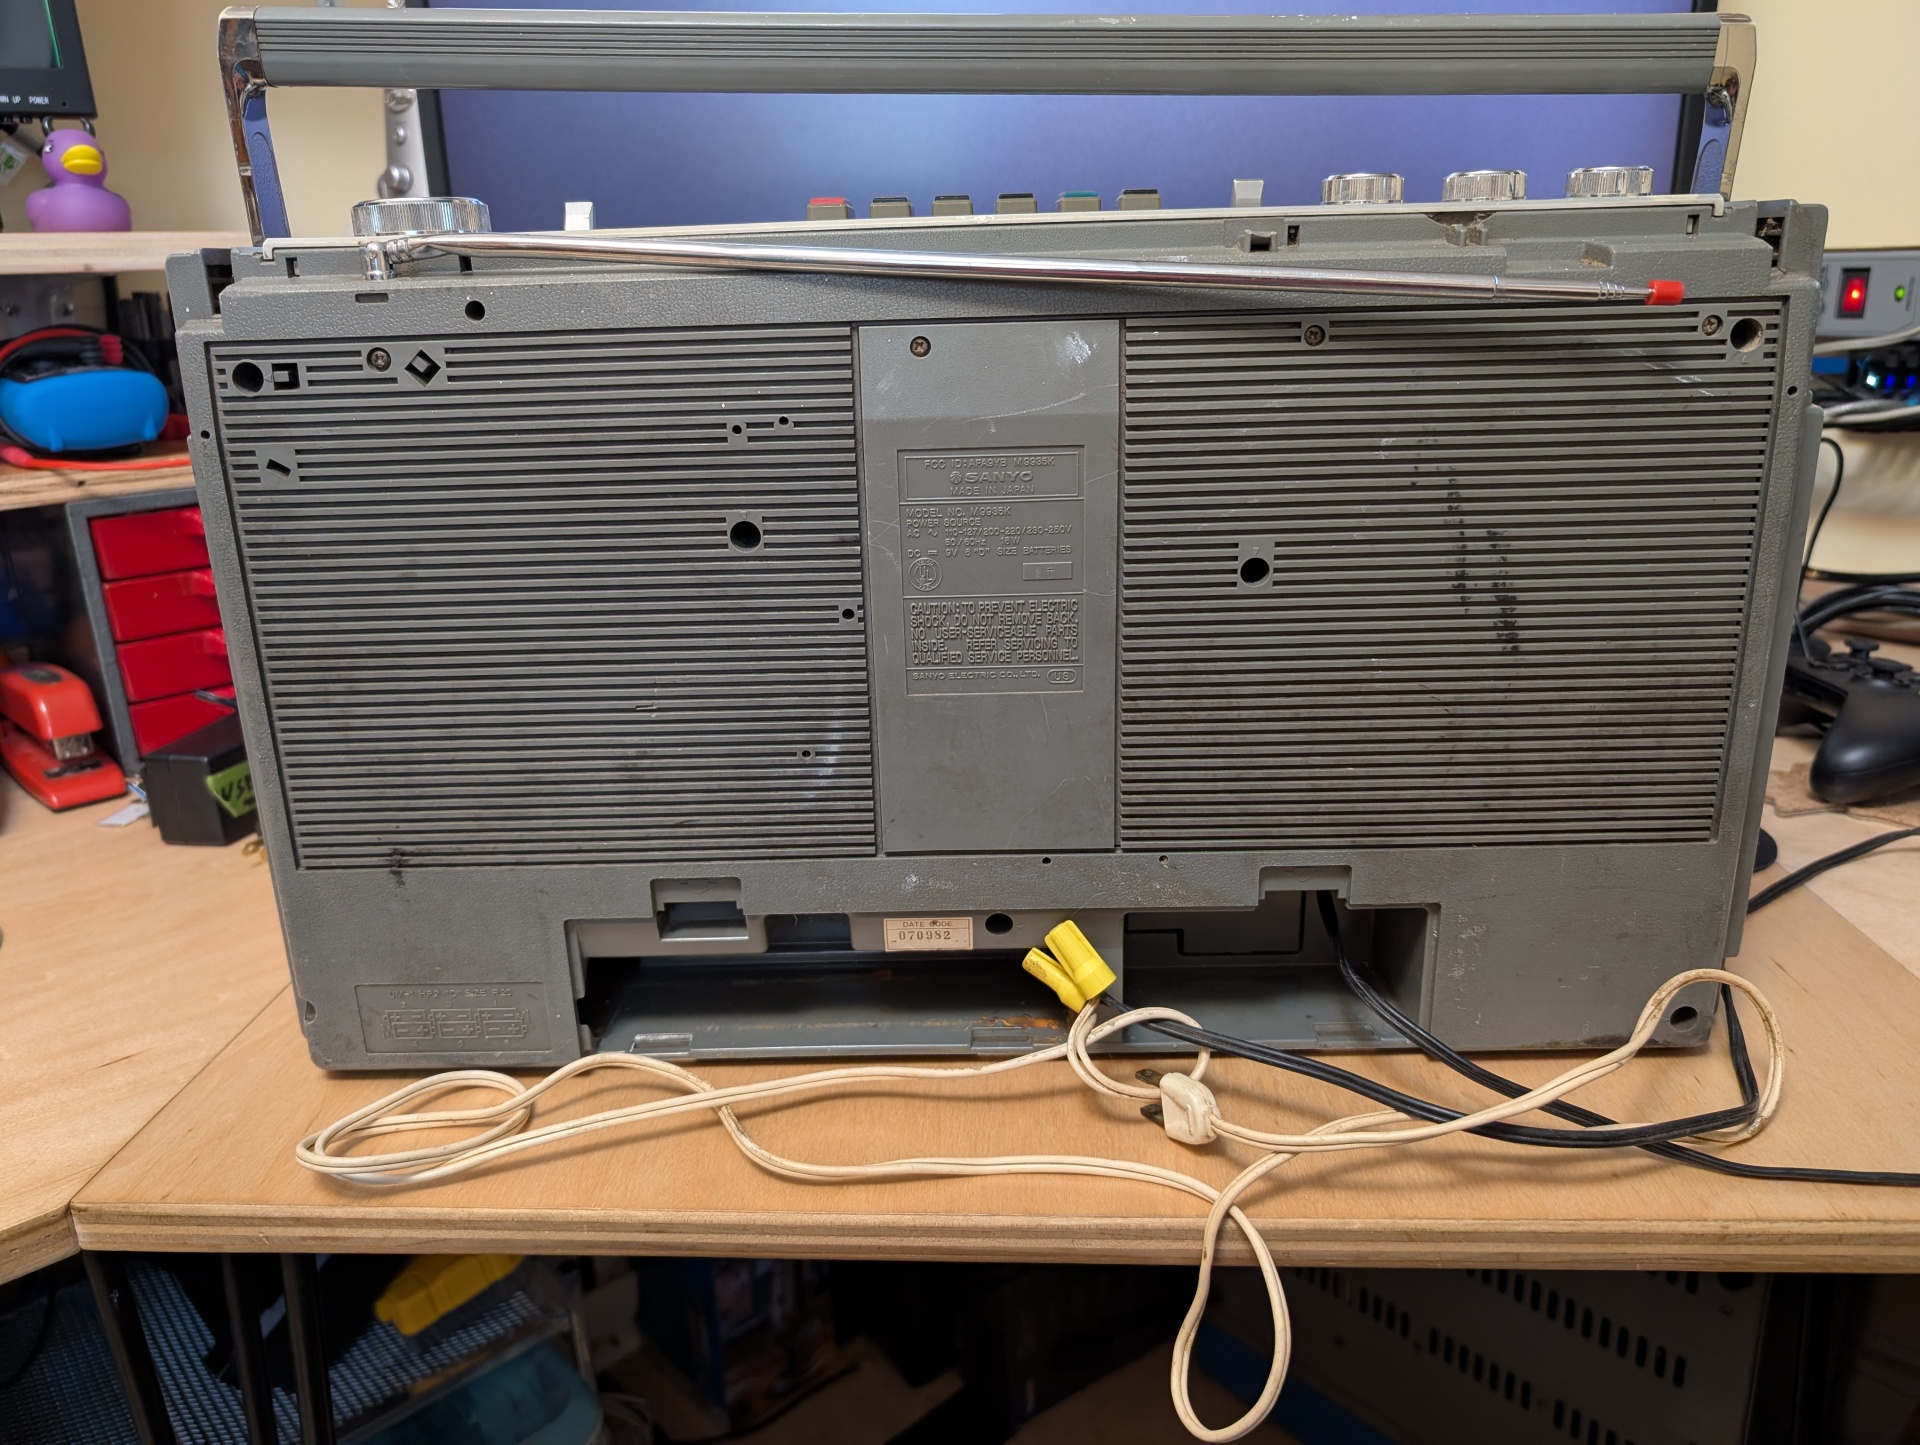
Natalie and I got this Sanyo M9935K boombox at the Brimfield North market on Memorial Day Sunday this past weekend for $20. It was raining steadily the whole day and there were very few patrons which is perfect for me. Evidently people saw this coming and Saturday was /huge/ for the vendors, so we were glad it was worth their while.
But on Sunday? They just didn't want to pack stuff back up. We saw tons of awesome retro computing and gaming hardware for very good prices even on day two.
Anyway, we asked if the radio worked and the guy literally said: "You'd proooobably be better off making something out of it". And: "The radio works, and the tape works with the right tape..." And: "The power cord is cut, and there's another cord, you'll see".
And I'm like "I got a whole drawer full of cords it's fine". And we just walked out with it.
Other boomboxes for scale. It's not that huge, like 20" x 13" but definitely bigger than I thought:
It wasn't until we were home that I spotted some key flaws. The handle was only doing Handle Things on one end. The other end was floating freely. It functions as a handle but it's just because it's slamming into the top of the slot. Noted. This thing was someone contractor's "truck radio" for quite some time if I had to guess.
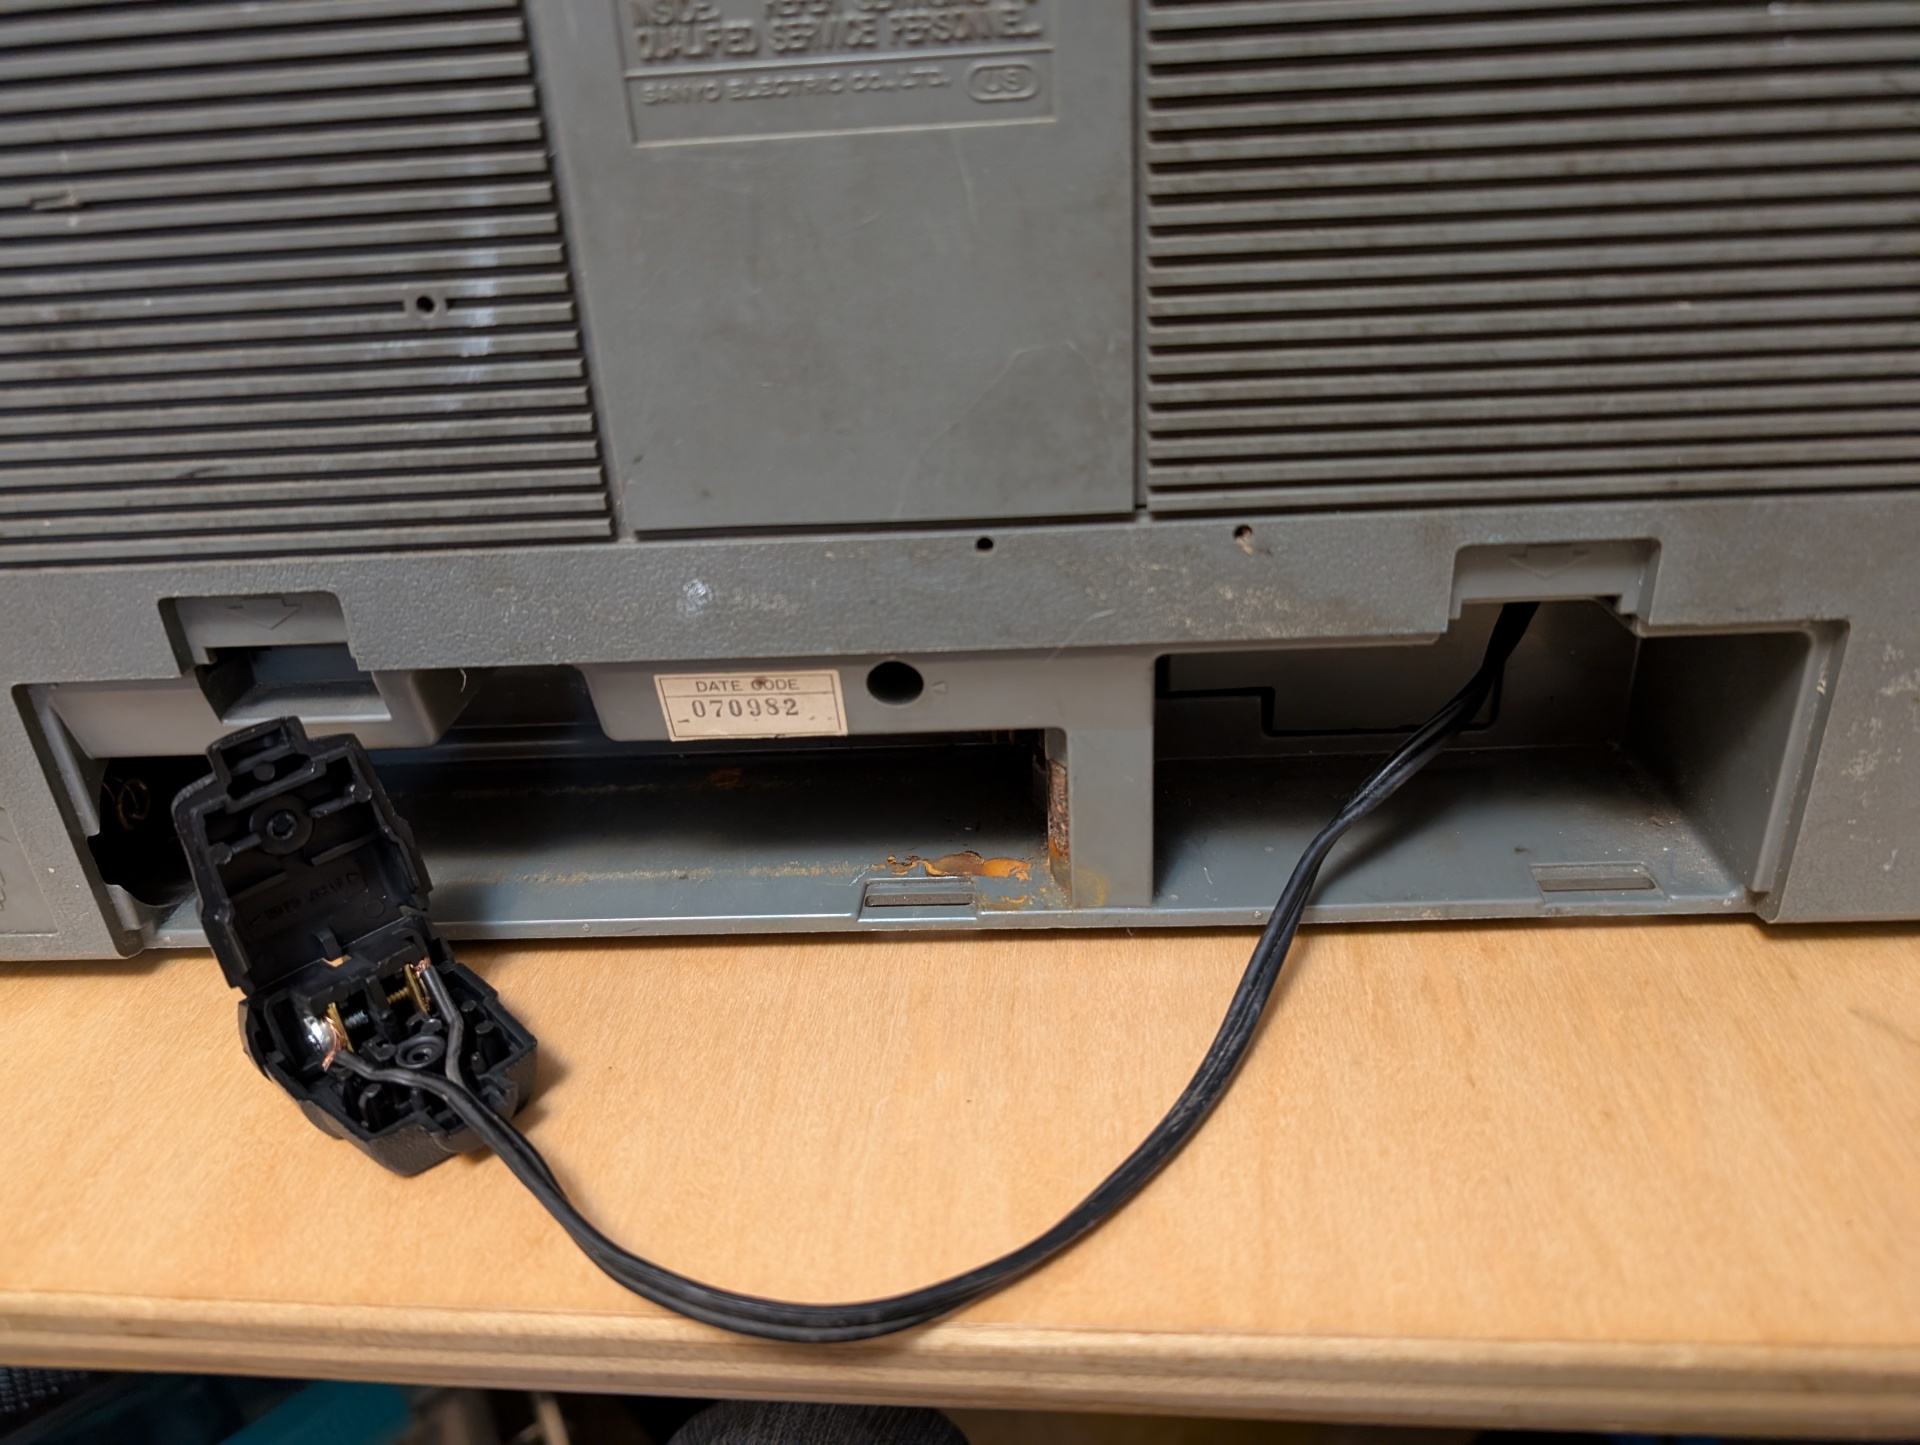
The power cord is permanently attached from the factory, so that's super cool thanks Sanyo. It's cut in the middle and spliced together with wire nuts to a 2 prong plug that was like 20 years old when this boombox was made. It's also got several areas of exposed copper.
I decided I didn't have time for this thing to be in my office this week, so I had my super secret Ace Hardware mole get a NEMA 1-15 plug kit. I cut the main cord above the damage, screwed into the terminals, attached a standard extension cord and mounted in its ultimate resting place. 10 minutes, fits like a glove in its spot.
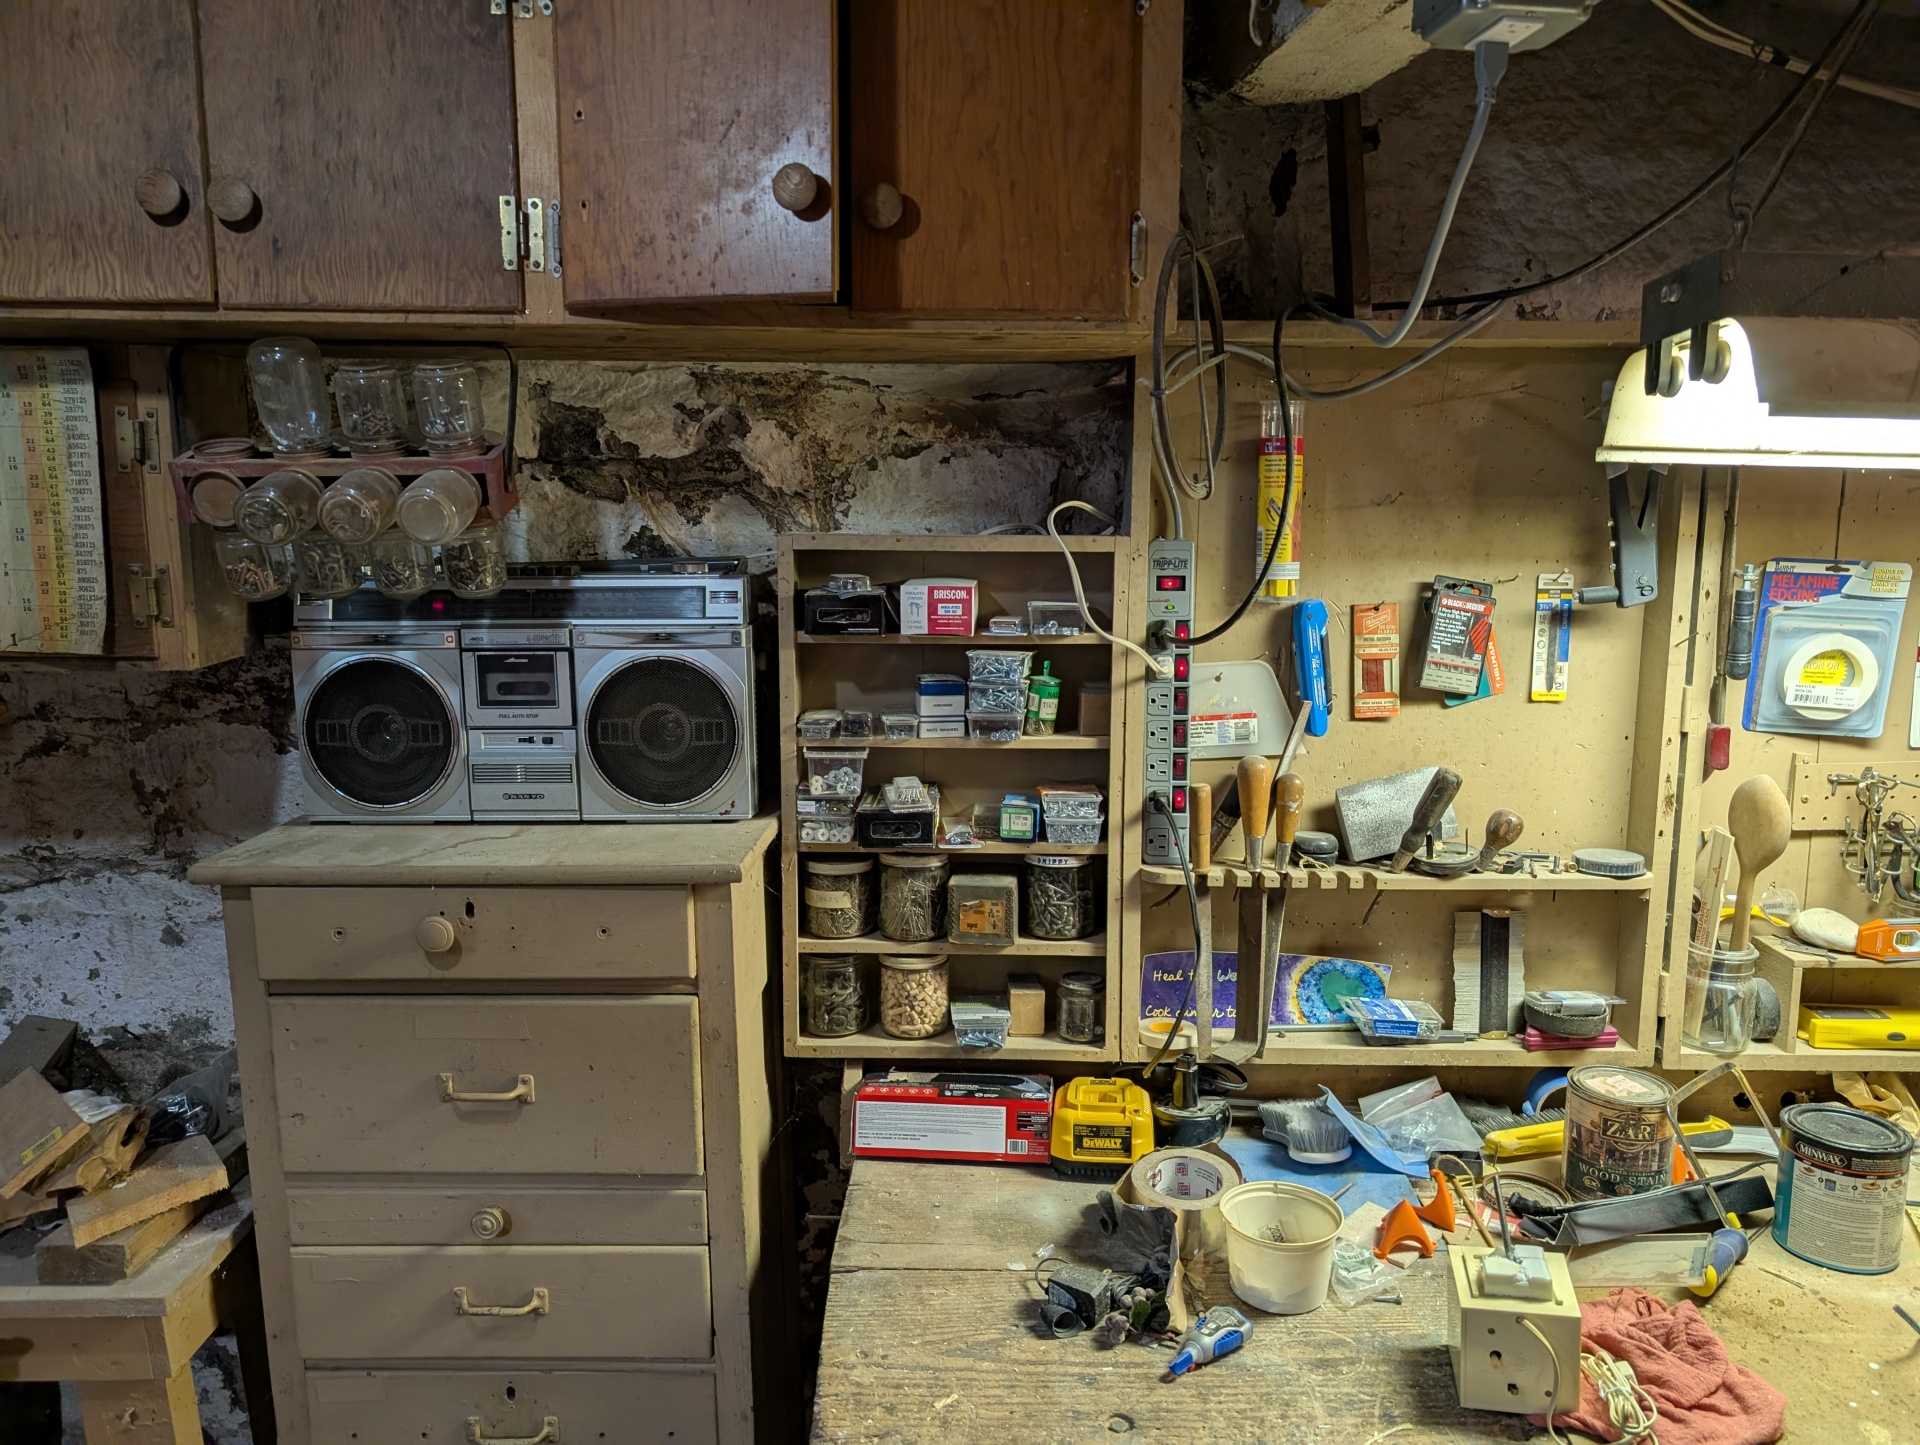
The real shame of it is is that this radio sounds GREAT. Maybe I should rescue it before any lasting humidity/mold damage happens to those speakers and clean it up it for the actual barn where it stays nice and dry.
Actually. Yeah, fuck it. This is now the Patio Radio. Sold. I'm just gonna drag an extension cable out there anyway so the short cord is perfect.
The search continues for a radio crappy enough that I don't care if it's in the basement forever but sounds decent enough and won't burn down my house.
Sandie Shaw - There's Always Something There To Remind Me
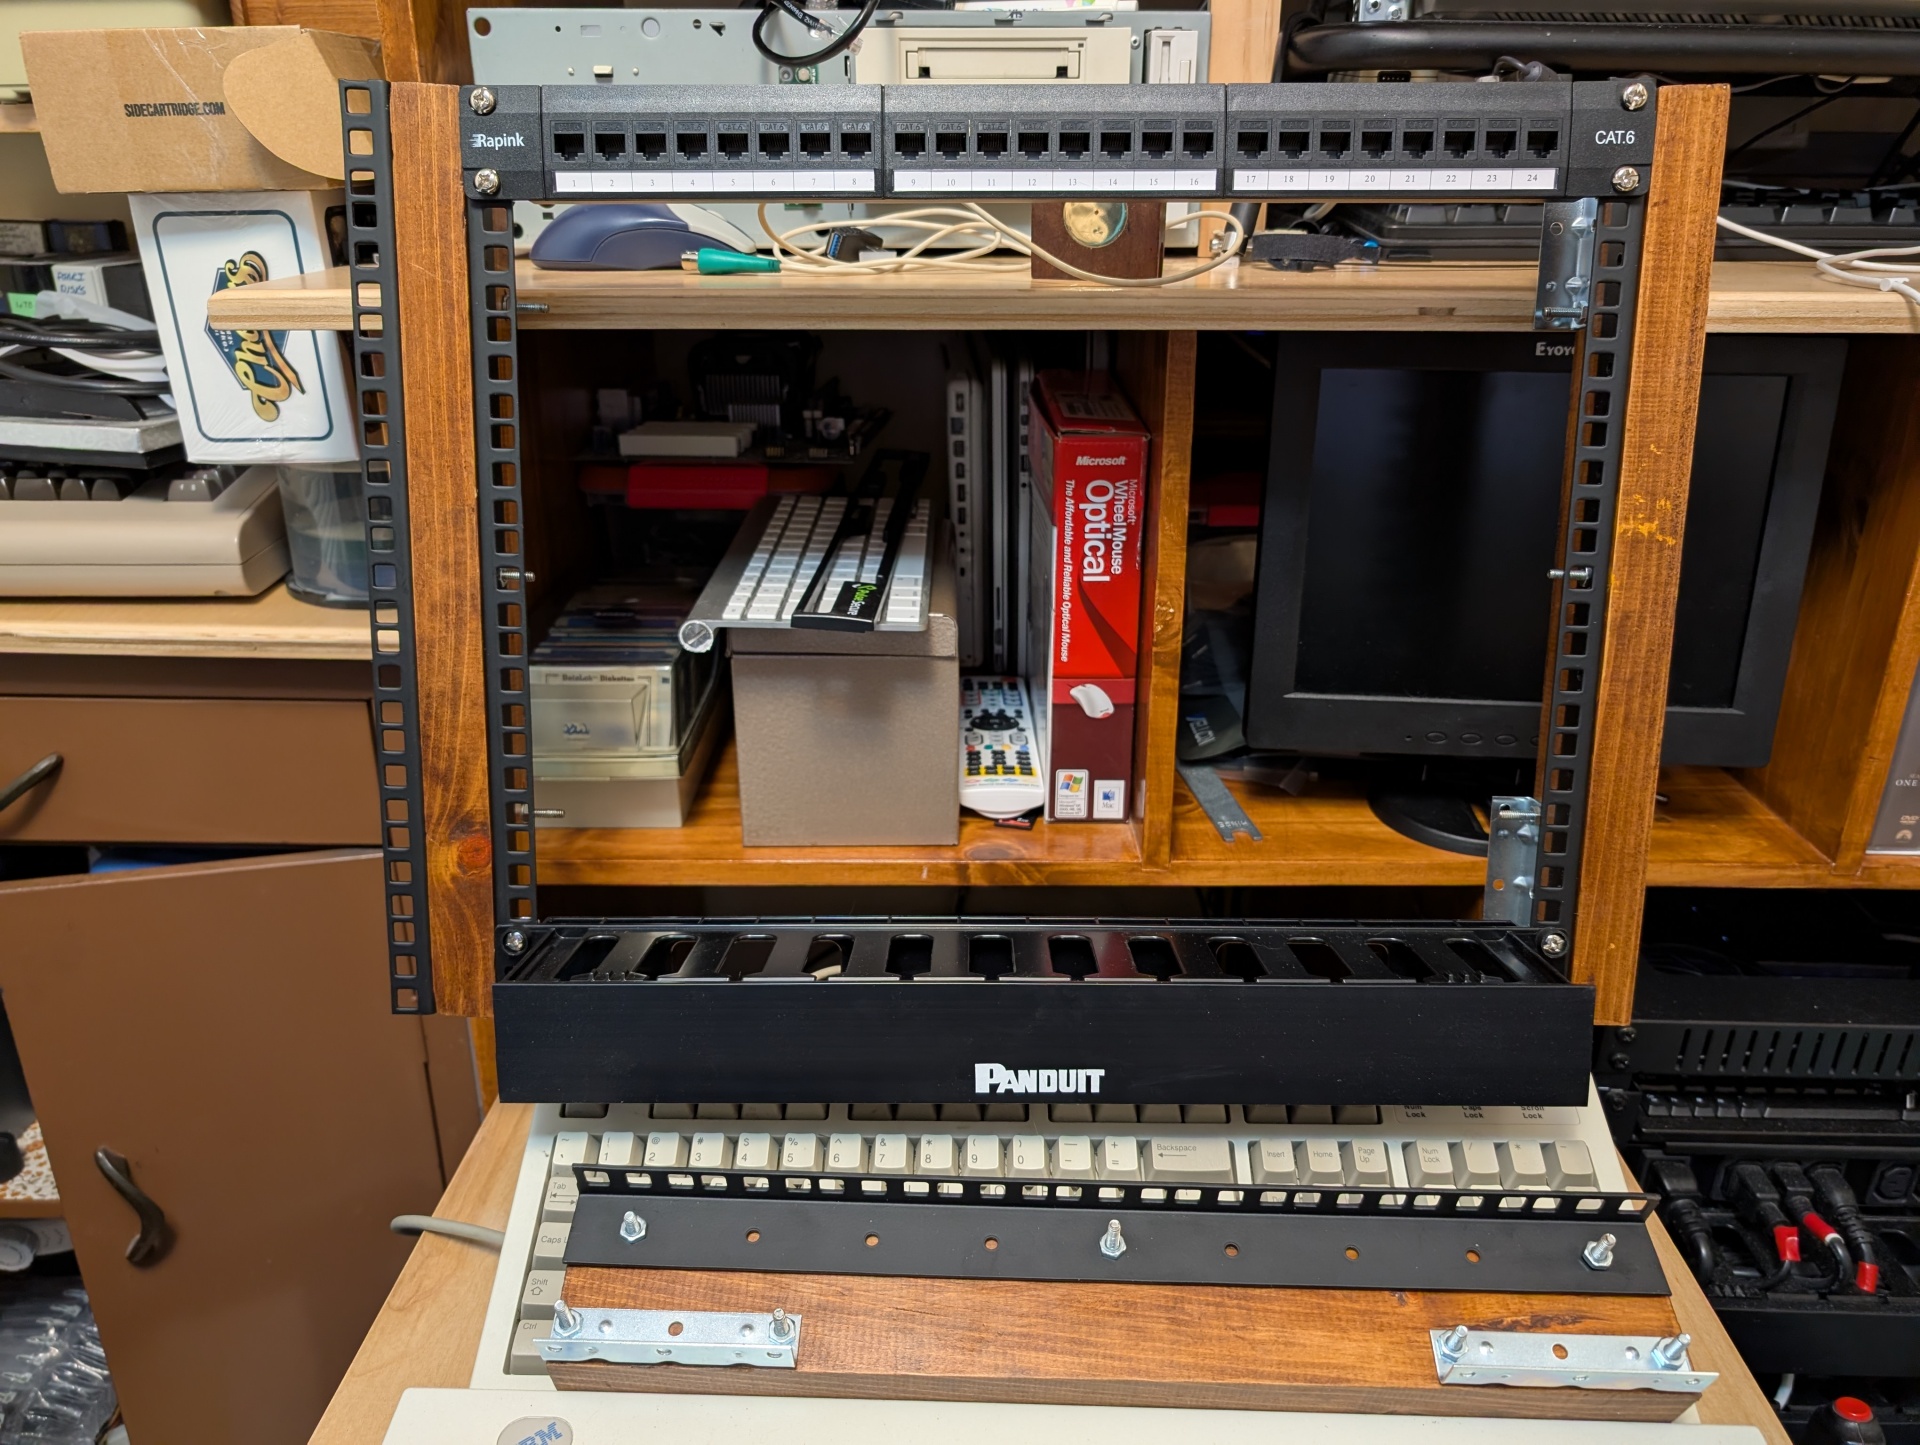
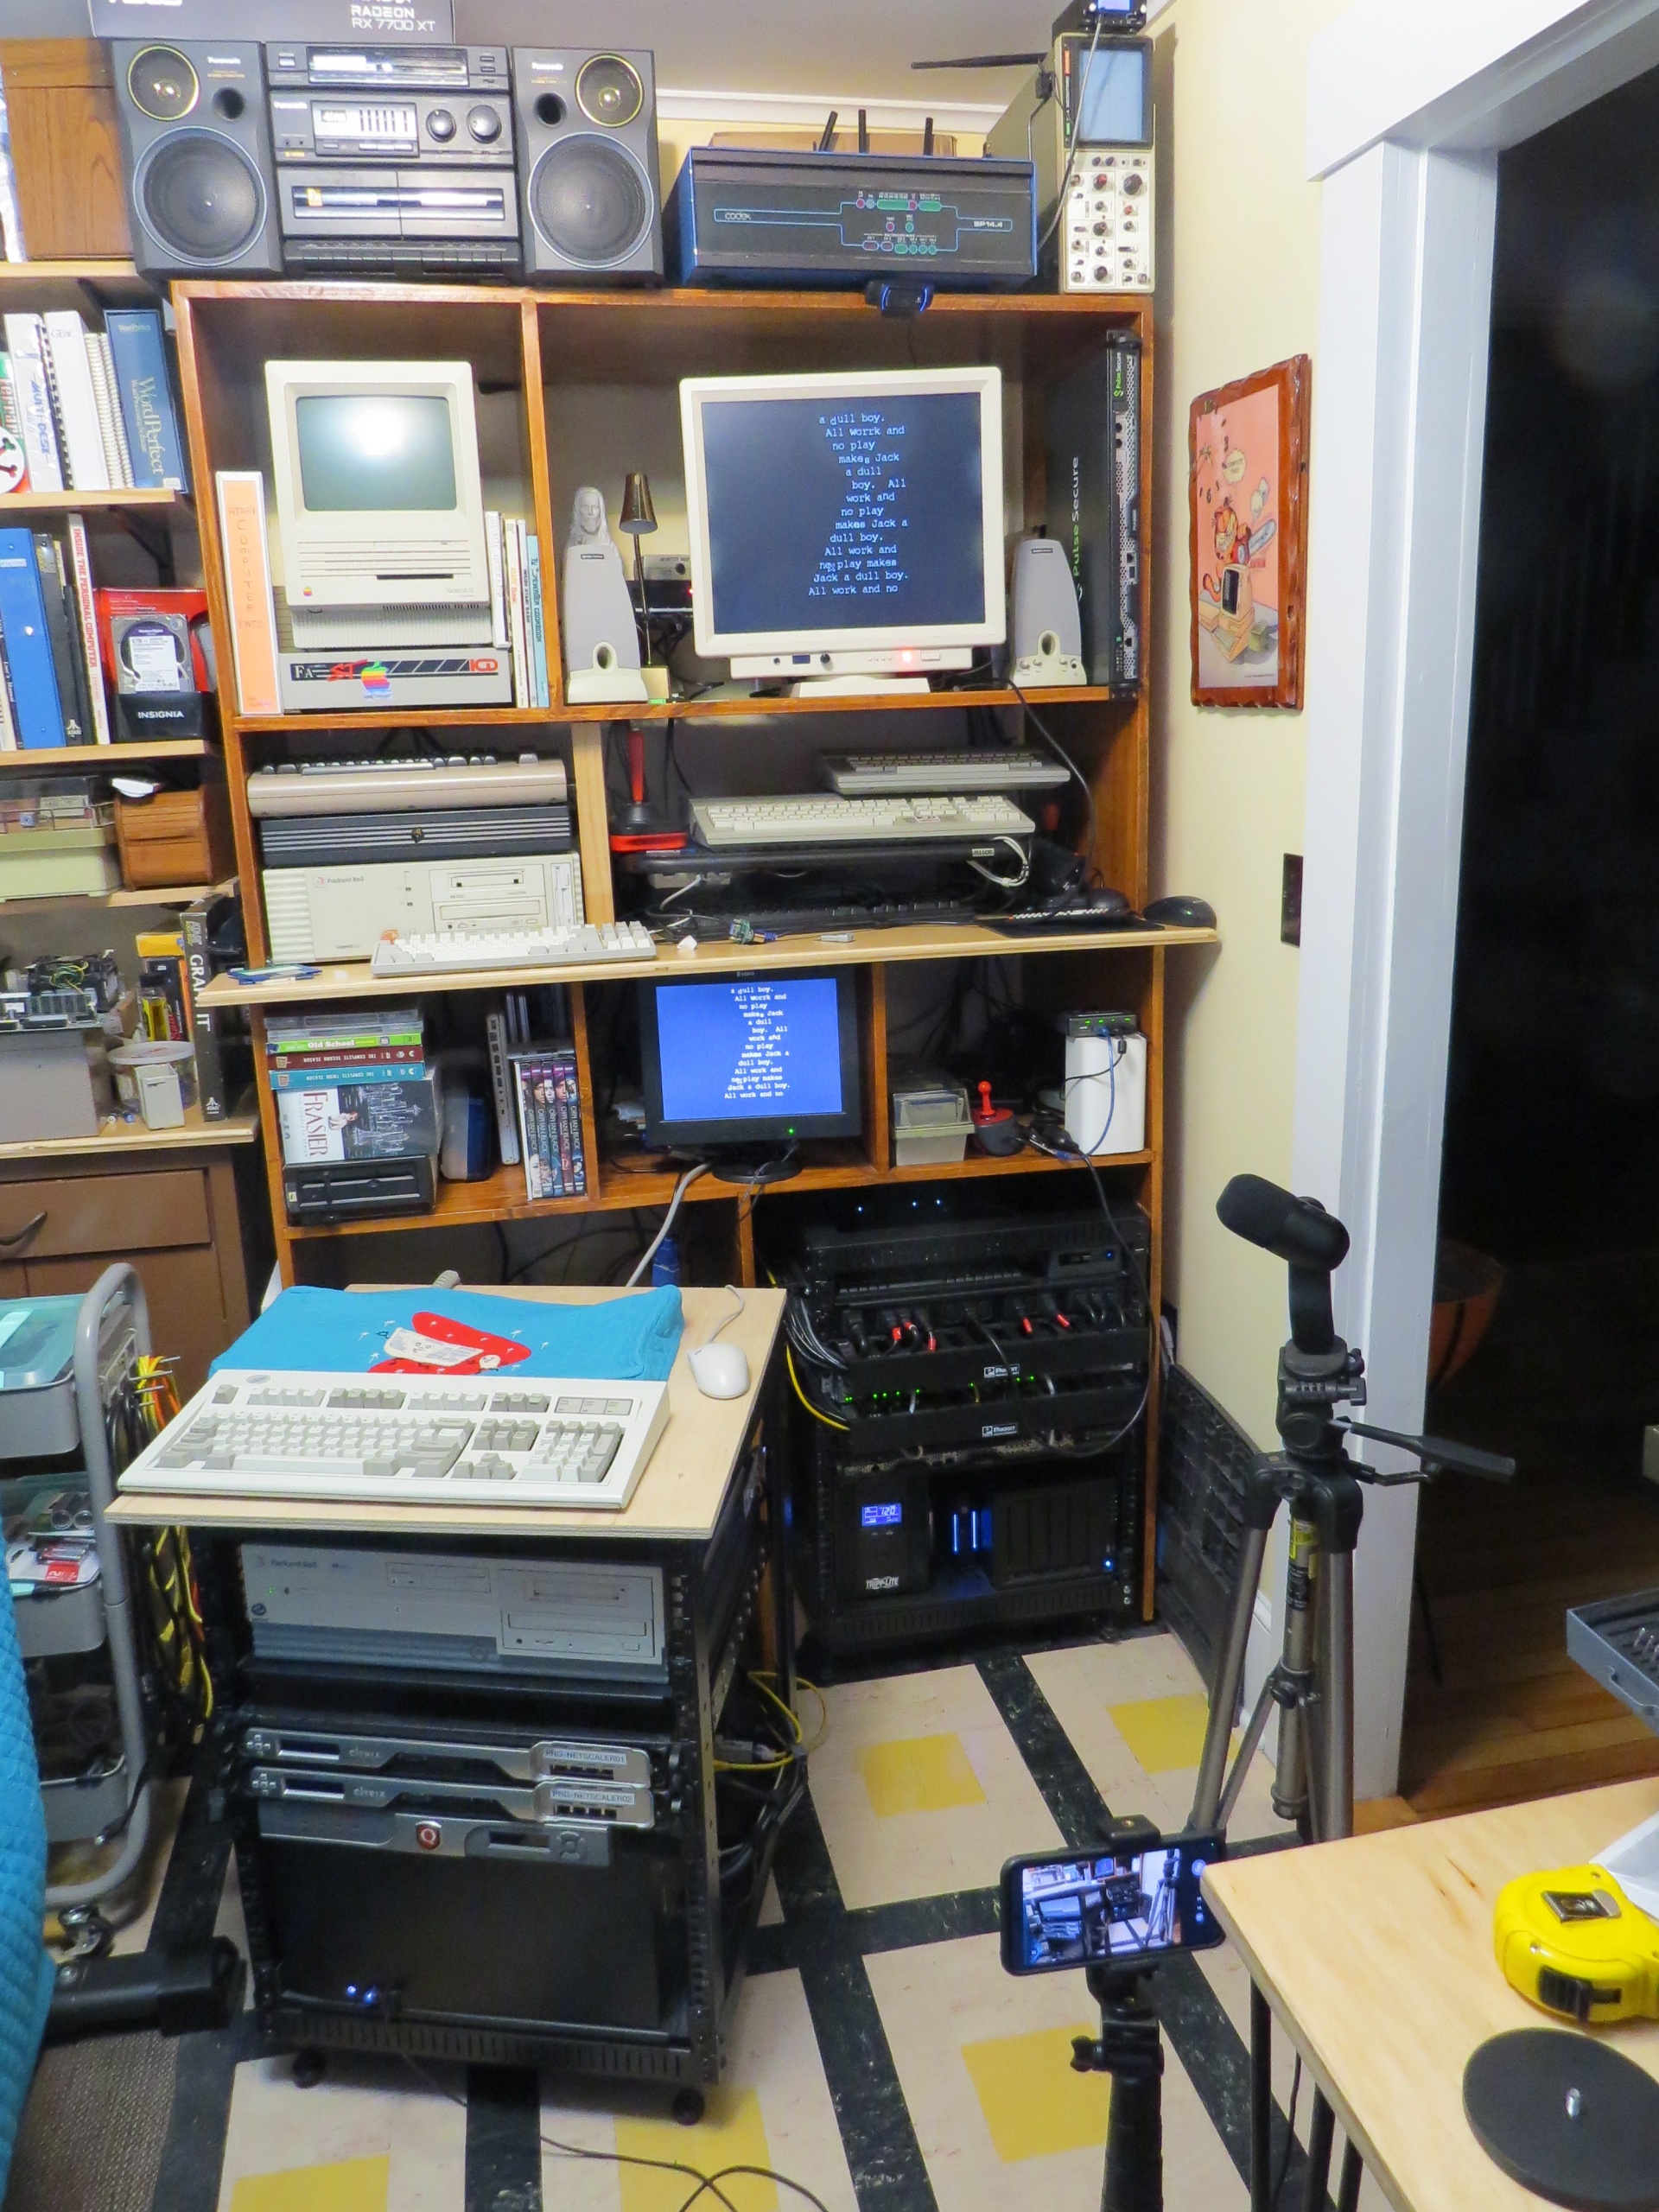
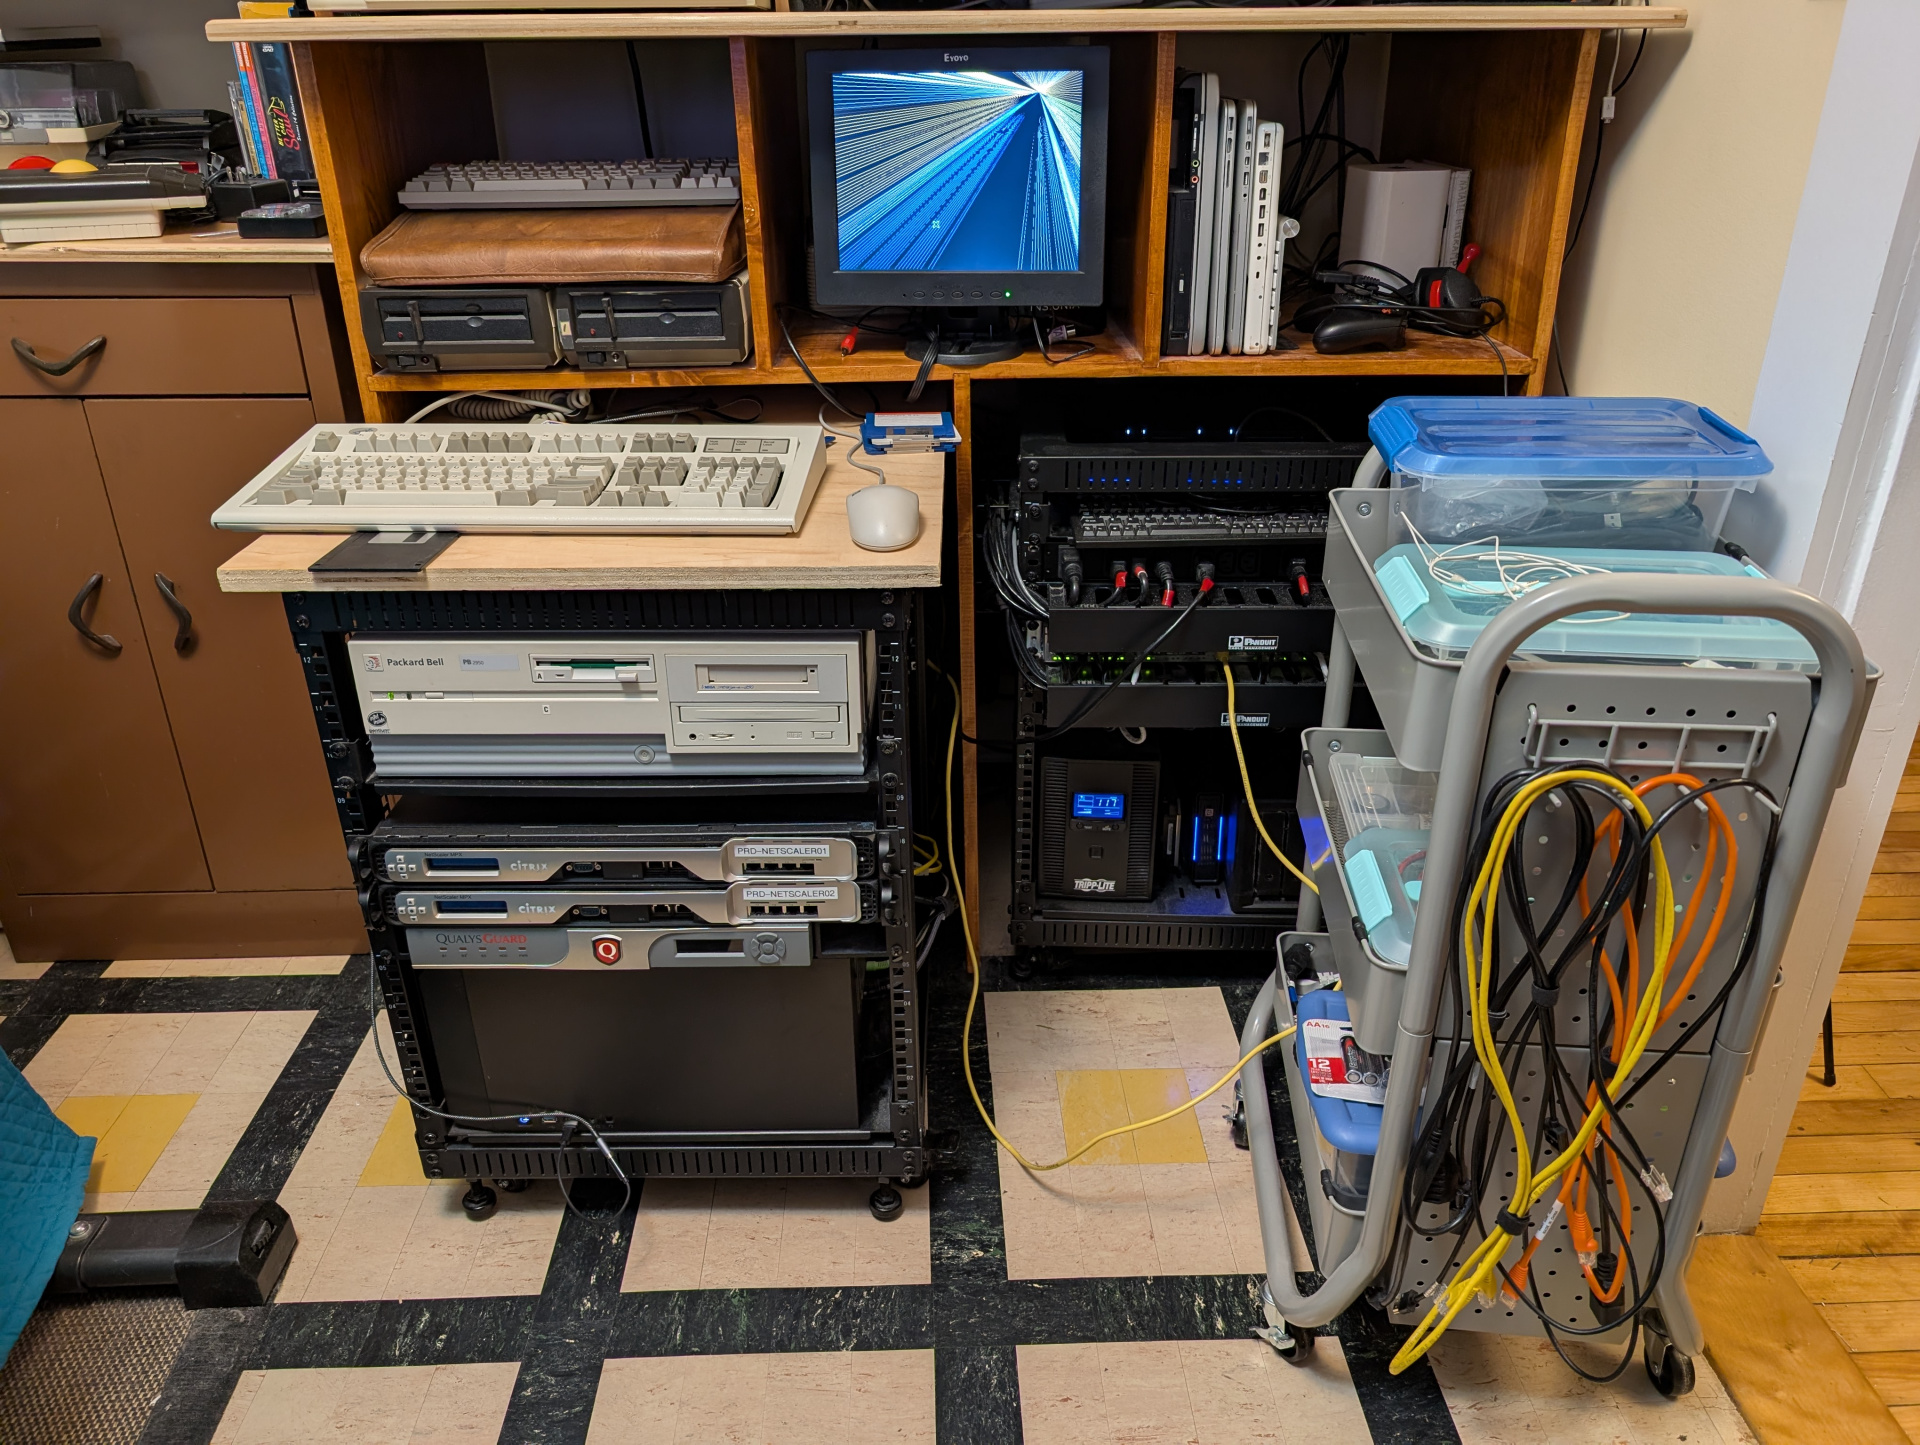
I put together the 9u rack rails today and they look great. I just used a 2x3 that we had laying around chopped it roughly to size and used BriWax to finish it which was super fast vs all the waiting around for stain and varnish.
Unfortunately it's not quite going to all fit inside the 31" wide hole I have for it. So that whole cabinet needs to come off the wall like 1/2". Which means anything we care about hitting the floor needs to go. The server racks will be just fine where they are.
One thing I am going to do is flip the bolts around on the outside two now that they're not going to be visible. Anyone sticking their hand back there deserves their tetanus. I'll put some caps on them. Maybe. I'll also carve out the middle section of each 2x3 for cable pass through.
It will also be nice to have this henge/cabinet at least loosely attached to the wall since I'll just jam some corner brackets to it. It's not unstable, but now it'll never go anywhere.
Addendum:
As I was going through my go-to box of rack stuff for cage nuts I found this one bolt that I've had forever and really want to find another one of so I can do a thing or something. It's too nice to just toss and I do try to at least match so it's not like I'm gonna ever use it.
So anyway, I went hunting for captive cup washers and there are guys like turning them or water jetting them for like 35 cents a washer, which seems a bit. Extravagant. For me.
So...Sell me them. How much man, gimme a checkout page. "Send Inquiry"? I don't want 40,000 of these things. Am I supposed to chat with the sales engineer? Miss Ting? Is this page a Ru Paul movie from the '90s?
Searching for the product only ever brings you to this page, so that's cool.
Today was my last day at work, so of course I'm pulling an all-nighter working on projects and building my workflow. I don't think that will ever stop.
*I just got yelled at at 2:40am for pulling an all-nighter right now today. I'm like dude, it's my vacation, and this is me, relaxing on my goddamn vacation! I can sleep in a few days*
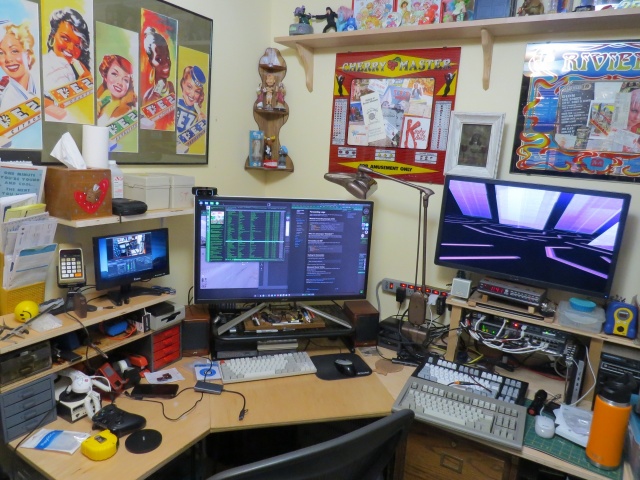
This is the desk I sat at for the last 5 years of my job and for two days a week for a decade before that. To be honest it feels weird for the job to be gone and for me to still be allowed in here. This is likely the last photo that will have my work laptop running Gibson in it. I am currently running through every bin and every parts drawer and converting my entire life over from full time network and server admin to ... someone who just hangs out and does projects and upgrades and documentation for a while.
And this is a sneak peek at what I mean when I say "I have a lot of projects in mind for this CheckMate monitor". I'm waiting for one sort-of crucial piece to this puzzle, then I'm going to make an in-depth tour of how I run all of this stuff, from media services to radio broadcasts. I'll be upgrading and making a lot of sysadmin improvements now that I have been freed for a bit. Retro computers are a piece, but are not really the "purpose" of this pile of stuff. My talents lie elsewhere. Fun times ahead as I embrace my inner digital hermit! I will explain why that is a good thing.
The Disposable Heroes of Hiphoprisy - Television, The Drug of the Nation
For a year now I've had a Checkmate 19" 4:3 aspect ratio monitor, and I want to show how that's getting used. The reason I kind of sat on it for so long is that I got frustrated, then depressed and spiraling, and finally decided to fix things and spend myself out of my problems. For Health! And here we are, fully working solution, I'm super happy.
I've seen these monitors start showing up in videos from folks like Nostalgia Nerd and Modern Vintage Gamer, but I haven't seen them really exploring it so I want to share some of my favorite use cases. And with my upcoming sabbatical I'm planning on doing a lot of projects involving the machines you'll see here so I wanted to kind of intro everything before I get started on those.
So let's go check it out! (Caveats: I am not comfortable making videos, and I'm not good at it. I didn't edit out many of my "behind the scenes" bumbling because if I have to figure it out, you have to watch me figure it out! Hopefully you find my awkward bumbling "charming")
TL;DW;
The Checkmate is not just a monitor, it's also an integrated electronics project box, 2u mini-rack and hacking platform.
Basically as I said I ran into one or two semi-issues. The 15Khz horizontal scan rate thing on the VGA port was a real bummer and sent me down a hole, but the OSSC Pro worked out great to help solve that, even though I really don't understand that thing at all. It looked like shit for like a month and just through random button-mashing I got it to work great for both mono and color on the ST. Thanks to CTRL-ALT-Rees for the in-depth review of the OSSC vs RetroTink video specific to the Atari ST platform. If I ever get up the courage to do a factory reset on the OSSC I'll try and document exactly what settings need to be twiddled to make this work in my case.
Thanks again also to BackOfficeShow for leading me to the realization that converting ST to VGA was all just a simple passive "hook the wires to the other wires" process which inspired me to do my Monitor Master hack!
Future projects and other use cases
I do want to see if I can hack a GoTek in there to use as a drive on my ST with the rotary encoder in the monitor. That would be about the slickest thing imaginable. I'll probably get a GoTek with an encoder and try to remove that one and use the monitor one instead.
There are 12VDC headers on the backplane board. Can I wangle one to a barrel jack and mount an 8 port switch in here? I have a couple of 12v@1A Netgear GS108T switches and I'd love to see if I can pull that much power and have a little self-contained network. This is pointless. The Pi in there is just on WiFi, but I kinda want to see.
My most recent job ships cases and cases of hardware to healthcare trade shows. Much of the network hardware for the booth and even small PCs for running demos could easily be securely fitted into a Checkmate with the HDMI out going off to a big TV.
Portable industrial control and automation platform as a self contained control station again with several SBCs and integrated network switching
I'm a network and datacenter-ops guy who naturally looks at everything through that lens. If I were building a crash cart or repair workbench I'd love these just to fill with low power SBCs (Pi 3 works great) and switching for a portable KVM, isolation network and test suite.
While they're not "cheap" for a consumer product, thinking in terms of even small-scale datacenter hardware they're an absolute /steal/.
Other Quirks
I did run into a race issue with the Raspberry Pi as well. I think it takes a bit for the monitor to be fully up and ready to receive video as it starts up. At first I thought it might have been an inrush current type thing, but I think it's just that the monitor isn't "up" yet when the Pi starts shooting out video.
When I'd boot the monitor cold there would be no video until I unplugged and re-plugged power to the Pi. To fix that I added a 10000ms delay to /boot/config.txt and it works great:
boot_delay_ms=10000
To give you a sense of the depth of my personal psychosis, the other issue I kind of have is a ridiculous future-proofing one that is bonkers to even be worried about. There are 6 HDMI inputs on this monitor, but only the main one is directly addressable through the front-panel buttons. Using the front panel, you can switch between HDMI-1 and one of HDMI-2 through HDMI-6. To select between HDMI-2 -> 6 you must use the remote. You can kind of see me do this in the video.
From what I can figure out this of course makes total sense. The UI firmware of the panel, like the off-the-shelf stuff that is the same as the EYOYO monitors, knows nothing about the riser card with all those extra ports on it right? The firmware knows about two ports. The external HDMI-1, and an Internal HDMI that the mezzanine card plugs into, and can select between them. The remote therefore isn't interacting with that COTS firmware to do this, but instead it's controlling the mezzanine card to switch the input among the other 5 ports, which is a very neat way to work around that. I mean obviously the firmware can select the riser card ports, because that's where the composite inputs live as well. If I had to guess it "only" had code to handle two HDMI inputs, so this workaround was implemented.
That's obviously a totally rational way to do this, and really the only way you probably can. It's awesome. My "planner" brain is just saying well, what about in 30 years when that remote is dead or lost. How do I select those ports?
For all I know I can control that mezzanine card totally in code over GPIO from a Raspberry Pi, or serial, or LIRC (which this probably is). Who knows. That's Future Guy's problem. I haven't even dug into that, but I certainly intend to! I want to see just how far I can push this.
Greetz and Links
Checkmate1500plus.com for making an excellent project out of total engineering passion. Excellent work all around to Steve and Appy and the rest of the team!
BackOfficeShow.com for showing how easy it can be to convert ST to VGA and switch between mono and color.
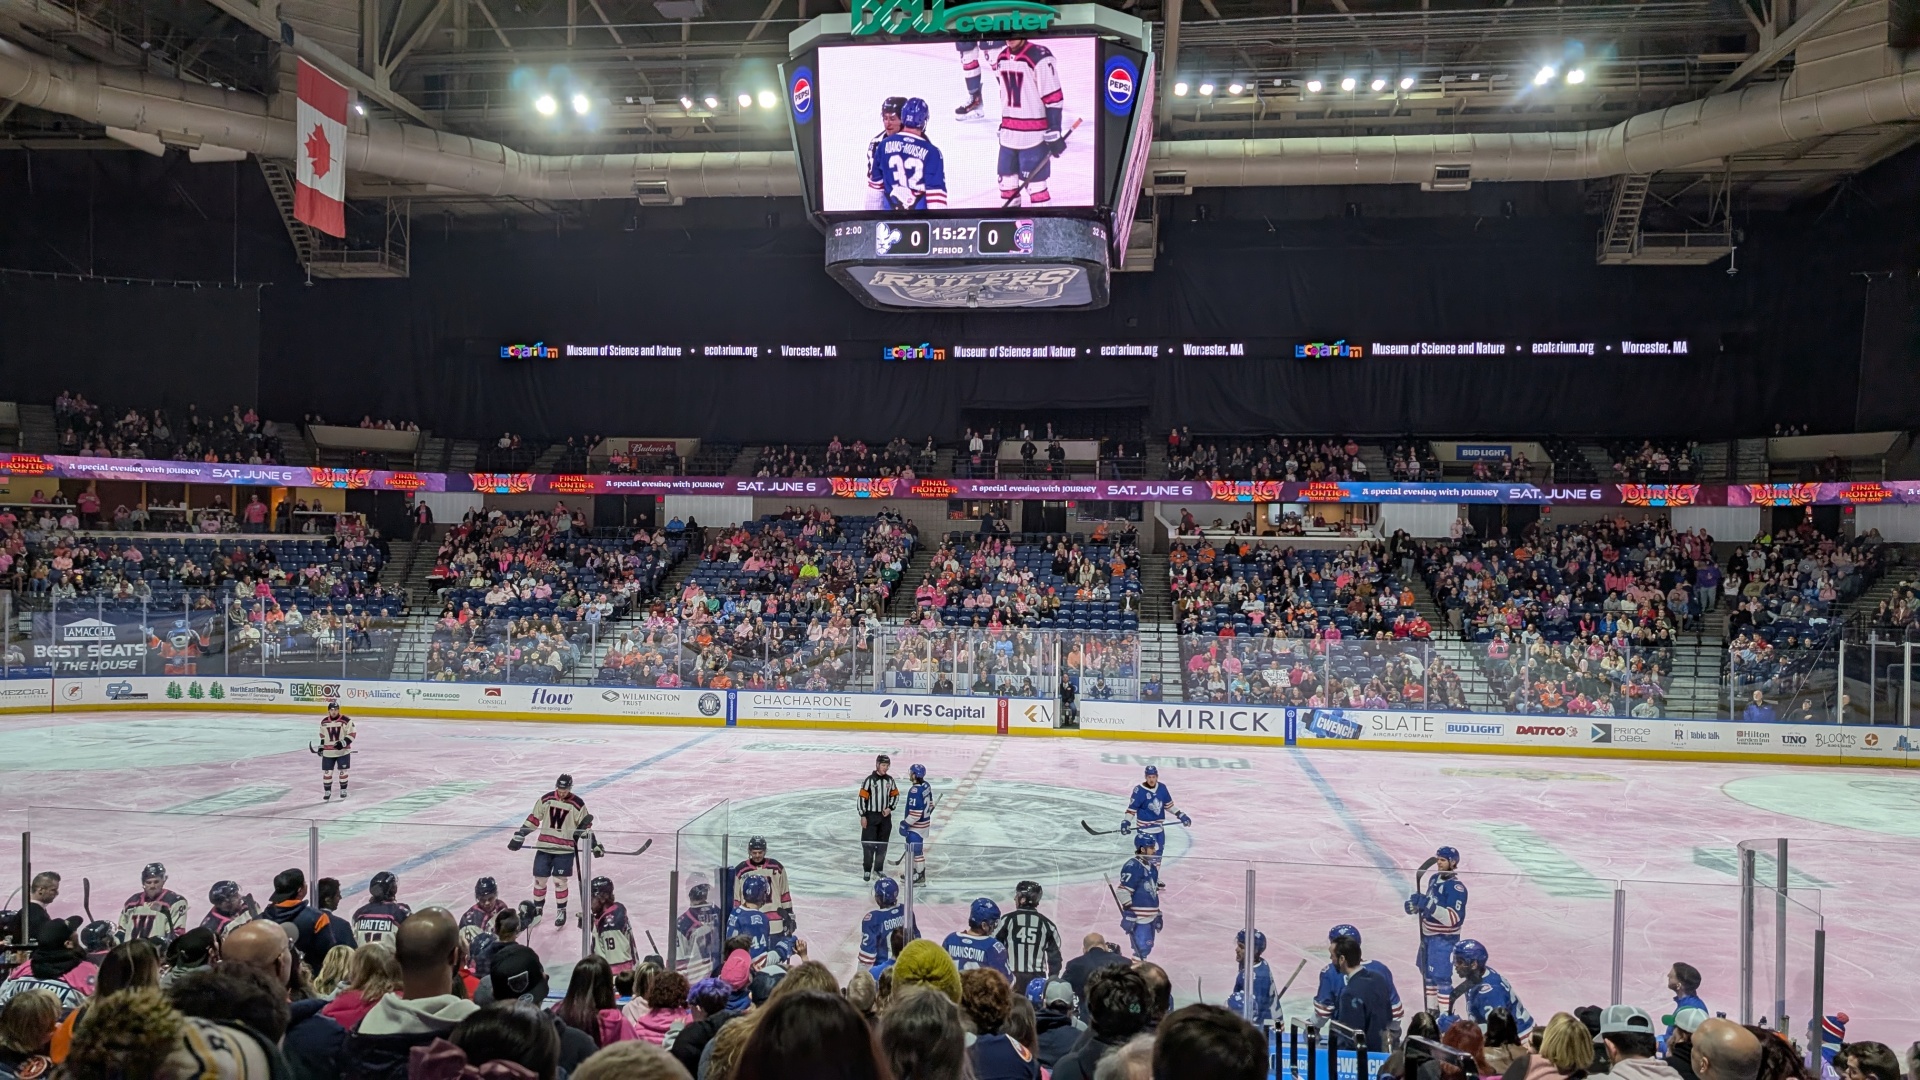
As has become tradition. Tonight we ate soft pretzels and watched Worcester lose to Trois Rivieres. On Valentines we try to do Hockey, on our anniversary usually we'll go the drive-in or Funspot, depending. Tonight was great. The (I think "teen", Natalie guessed 22) kid next to us is going to make someone a real fun friend to drink with one day in fancy restaurants. Natalie not withstanding, that "one" friend always draws me. I think I sometimes have been "that friend". She was getting so mad we were dying.
Fun fact, this is the first year in the last 18 years of my job that I'll be able to do something on Natalie's birthday or our anniversary weekends. For several years I had to leave our anniversary weekend at the New England Shake-up in Sturbridge to go to Waltham and do monthly Colo Maintenance from 11pm to 4am Saturday morning crawling in bed at the hotel around 5:30-6 and waking up Natalie. The (often First and-) Second Friday after the Second Tuesday of the month is a cruel bitch with no regard for my stupid holidays.
This is how you do it, Journalists. An excellent summation of why I'm going largely Tools Down.
I bet there are renewable energy companies that need a guy to go in and run their printers and file server for half what I make now. I'll be happy to get paid rebuilding from this all someday.
I made a quick tour video for an audience of about four. Here's a brief look at the basic stuff in my office, much of which I will do better quality videos about soon. Maybe like a monthly VAST/SPACE meeting? I dunno.
Enjoy the 1992 aesthetic. Pretend it's a VHS-C tape or something you found at Goodwill.
Update: I didn't notice the screensaver during the whole desk part until uploading just now and it's my favorite thing ever.
Sinéad O’Connor - Jerusalem (AKA the nice lady who was right about near every goddamn thing)
I'm running this setup to backup some Atari ST 720K floppy disks I have. I'm interested in backups of BBS newsletters and general BBS/Early-Internet ephemera from the '80s and '90s and I'm finding cases where at a glance I can't find that specific copy of like STReport or whatever on the Archive. Also anything fun related to the specific Atari club we were all members of since this is likely the only copy of any of that.
I'm very happy with the roll-away desk surface on top of this rack: