
CheckMate IPS Retro Styled Monitor - My Real First Look

Just yesterday I wrote a whole thing about how I feel bad for sounding like I'm trashing this monitor, when in reality I haven't actually used it as a monitor for more than a few minutes total. I really want to express my admiration for Steve and his project.
After spending a day with the CheckMate I have decided that it's going to change my workflow in a big way and reminded me of the Real Use Case for this thing.
Since the very first video I of Steve describing the upcoming project and the plans for this monitor I planned to mount a Raspberry Pi in there and run it as my auto-booting 1-stop Retro Computing emulator. Basically I have a Pi 3 that boots to a menu with a fun splash screen to run Atari ST, Mac (Mini vMac), Amiga (Because you know, let's be real), or Dos / Windows 3.1.
So today Natalie and found me some very rigid spare pressed-board that was just the right thickness for the card slot and I did a proof of concept:

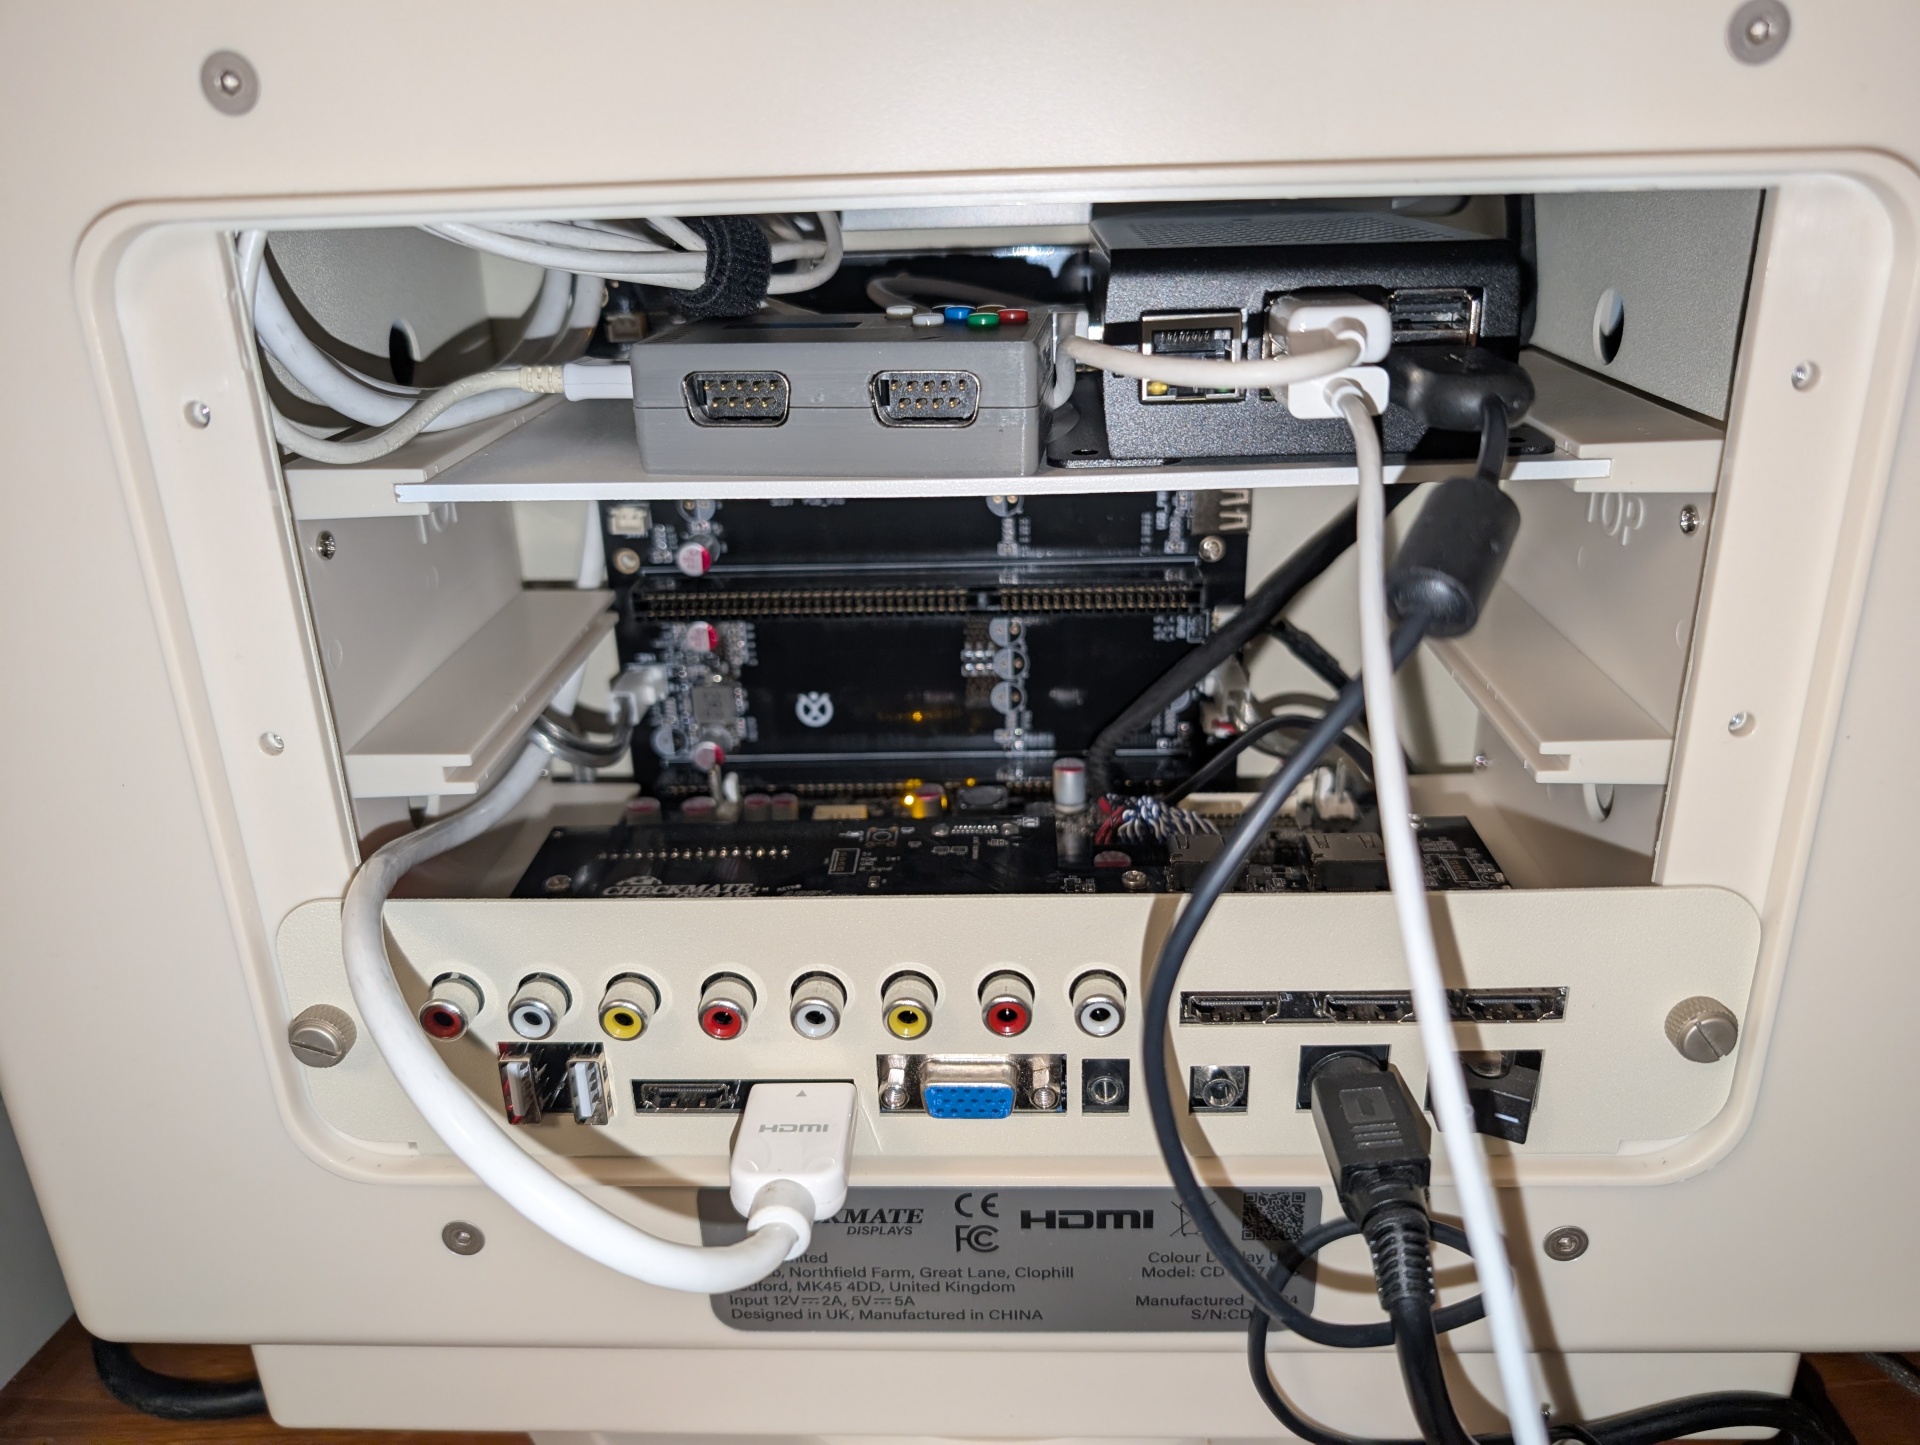
That pressed board stuff was also the exact depth of the card slot.
All I need to do is put some holes in there and bolt the Pi down and I'm done. There may well be a way to get an internal HDMI port, but I don't care. This was a "proof of concept" that I threw together in 10 minutes. I can't believe how easy this monitor is to work in. I used the internal USB port because I think it said "pwr". There's loads of room to manage cables.
I don't need like 80% of the capability of this monitor, but I think that's the point. It's designed to be an open platform, and I love that. Everything is maximally customizable. There are people building products that use the expansion slots. I'm sure someone's 3d printing a rig to host like 5 Compute Modules in there. I don't even think the rotary encoder thing is enabled unless you get a module that uses it. It's just built for flexibility. This is also why I keep going on about it being able to turn in place. It's so easy to swivel around and now you've got full access to the rear with the Pi ports right there and a whole bundle all the various video input cables routed tidily. As a 30 year IT professional I can say that access that convenient to the back of a monitor is a super rare and convenient thing.
As I use it more I notice the OSD and controls seems to be the same firmware lineage as my two Eyoyo monitors, which I also have to re-learn each time. And again none of my previous criticism has anything to do with the CheckMate project. There's no great answer to the "monitor control" question and it works just fine. The buttons are responsive and tactile which is a big help. The controls are just for input selection and basic panel and audio controls. I get the sense there's much more hackery that you can do directly on the board that might be fun to learn.
I actually need to make time to read the manual for this thing! (Which I do have, and it's comprehensive, but haven't really read).
This setup is going to fit multiple important roles. I'll build a new image and update my boot menu with work from the Witchboard Museum kiosk project. In addition to running all my "day to day" Retro Computer stuff (Games), I can use this machine as a permanent serial console as well as for retro games.
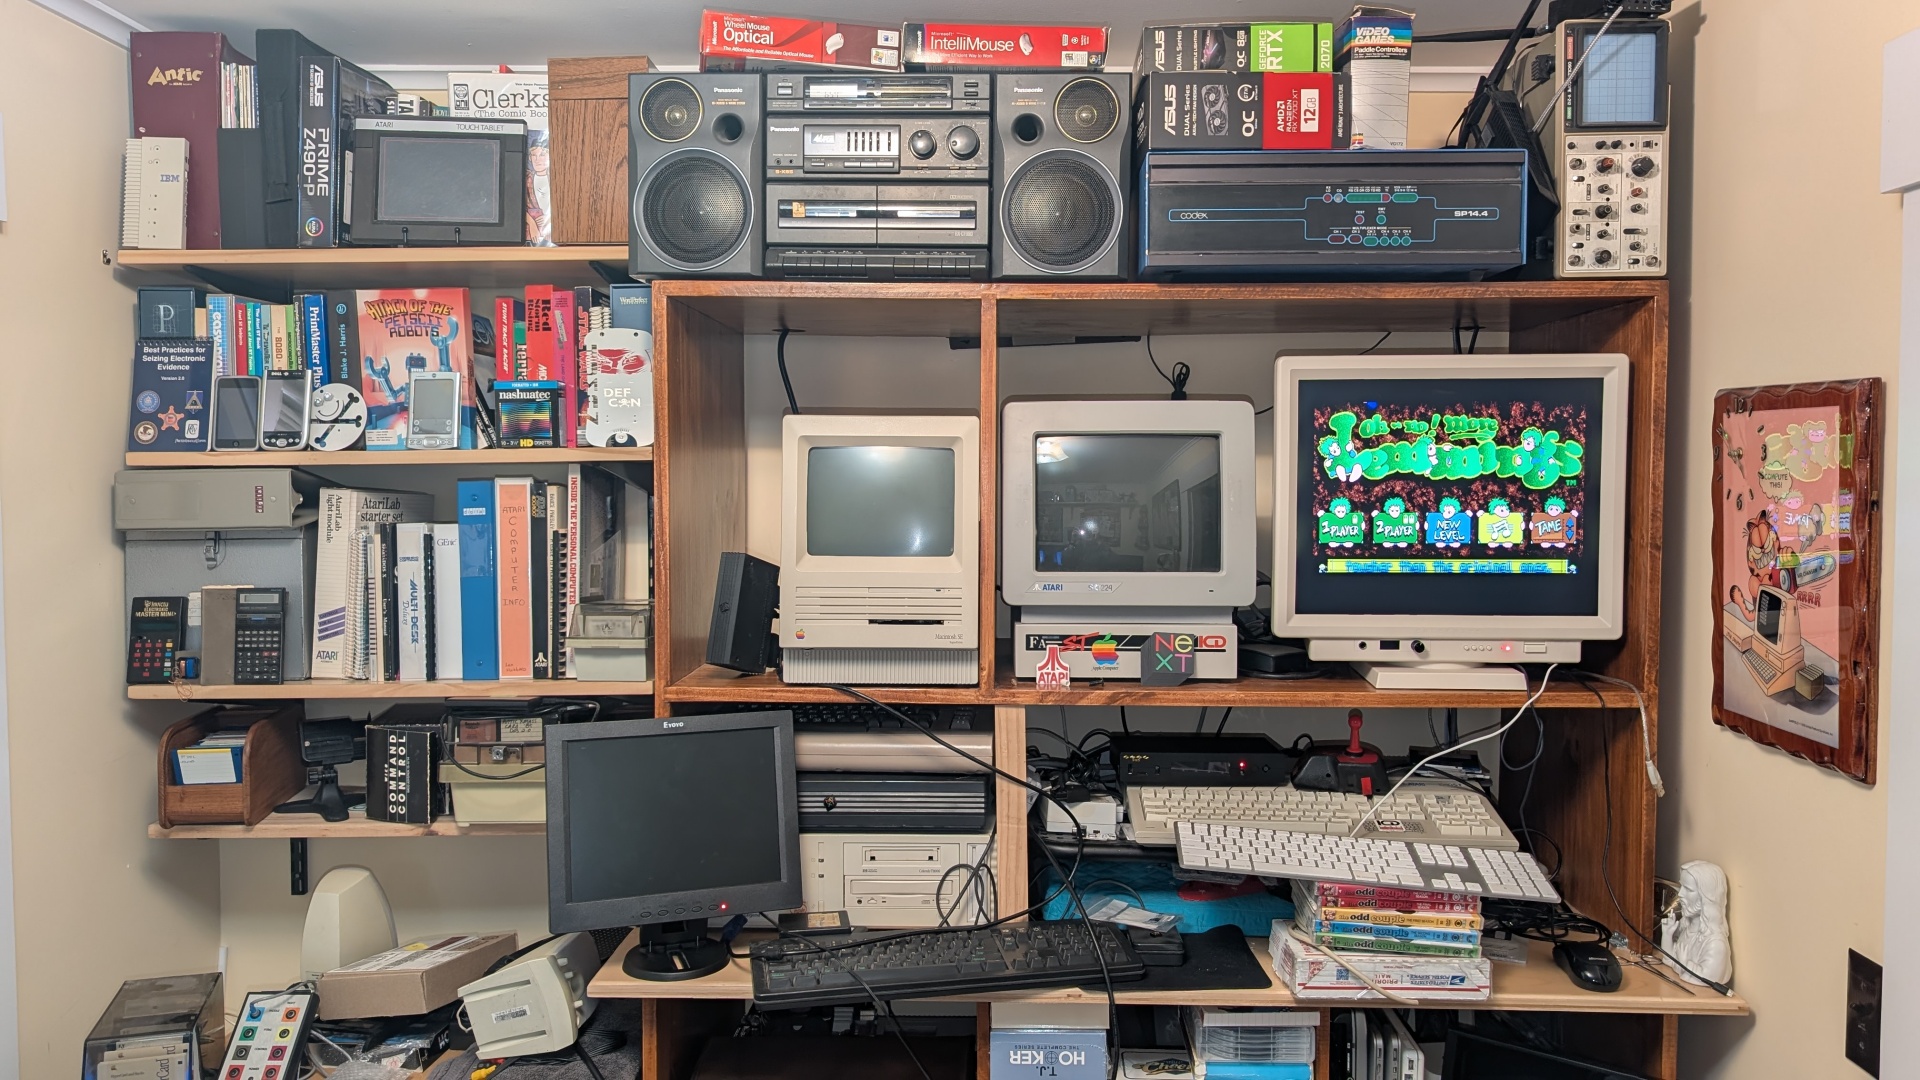
This is all a very welcome "easy win", which is important since this part of my "normally" well-curated office currently looks like this:
I have concurrent projects going on a NeXT monochrome system and an Atari 1040 STF (and specifically an STF), and both involve "getting them to display on a non-CRT monitor". The NeXT monitor I have is pristine, but it's of a type that historically had a very short MTBF, like on the order of months. So I'm not using that 35 years later!
So I have cables all over the place, the floor is covered with "project" and it sucks in here. But as things come together the Checkmate monitor is really proving to be a massively good investment in my future sanity.
And it looks /so/ good even though it's "Amiga Styled"!
- xrayspx's blog
- Log in to post comments
- 472 reads