There is a lattice of convenience which runs my house. From ripping CDs and DVDs to Kodi, Arcade cabinet, and a shitphone army acting as media players and remote controls. These posts describe how to sysadmin my house.
This one might be sort of tricky. Hey Natalie, do you guys sell anything we could like taste test in the store? Maybe I should email the lighting place like what we used to do back in the before times.
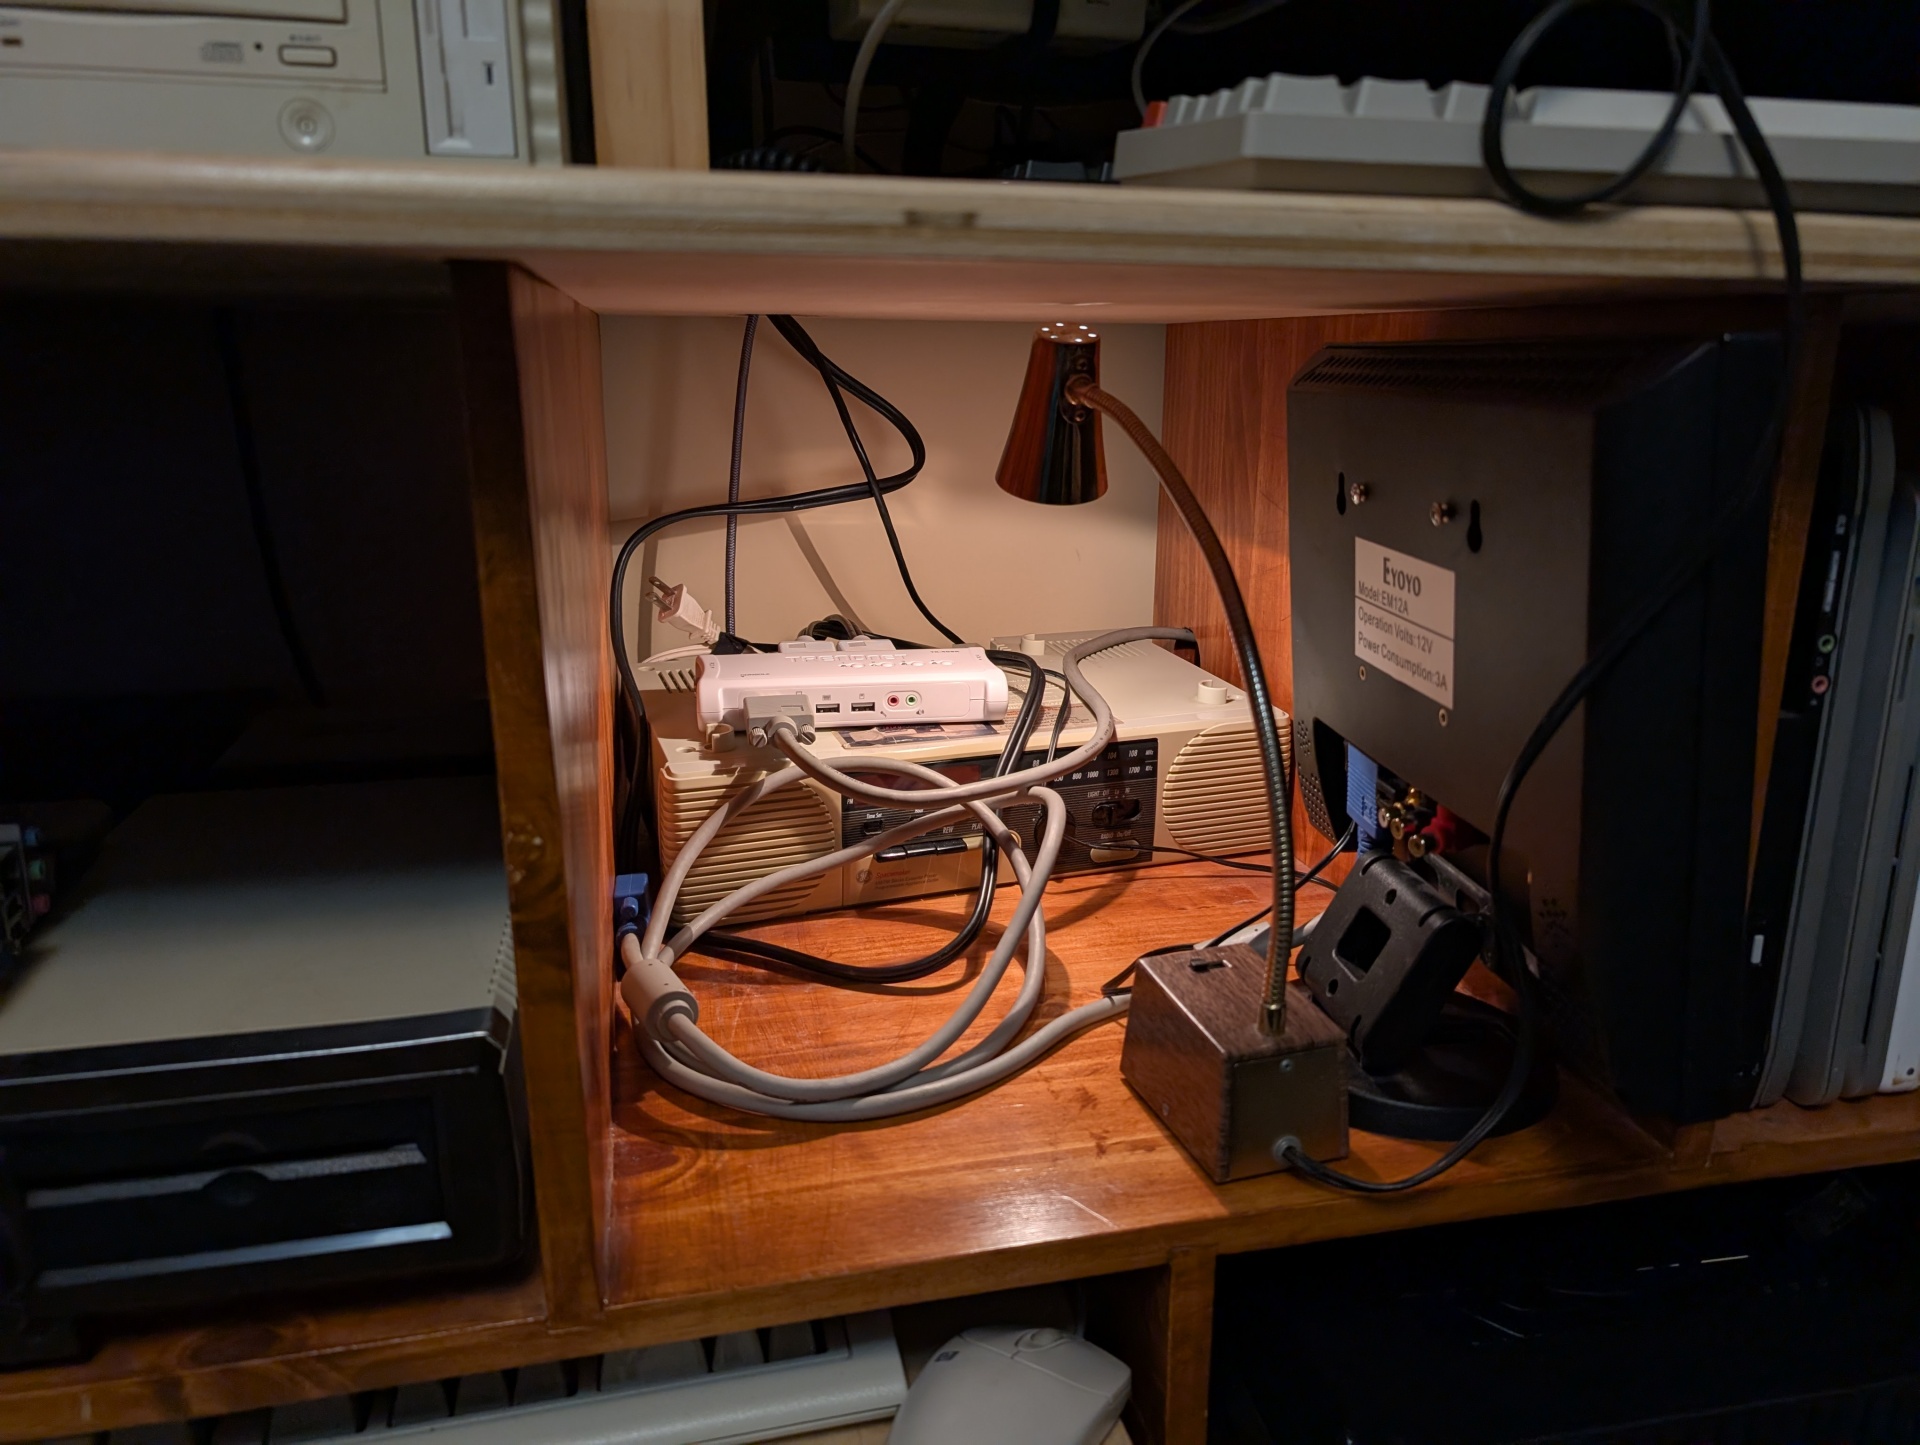
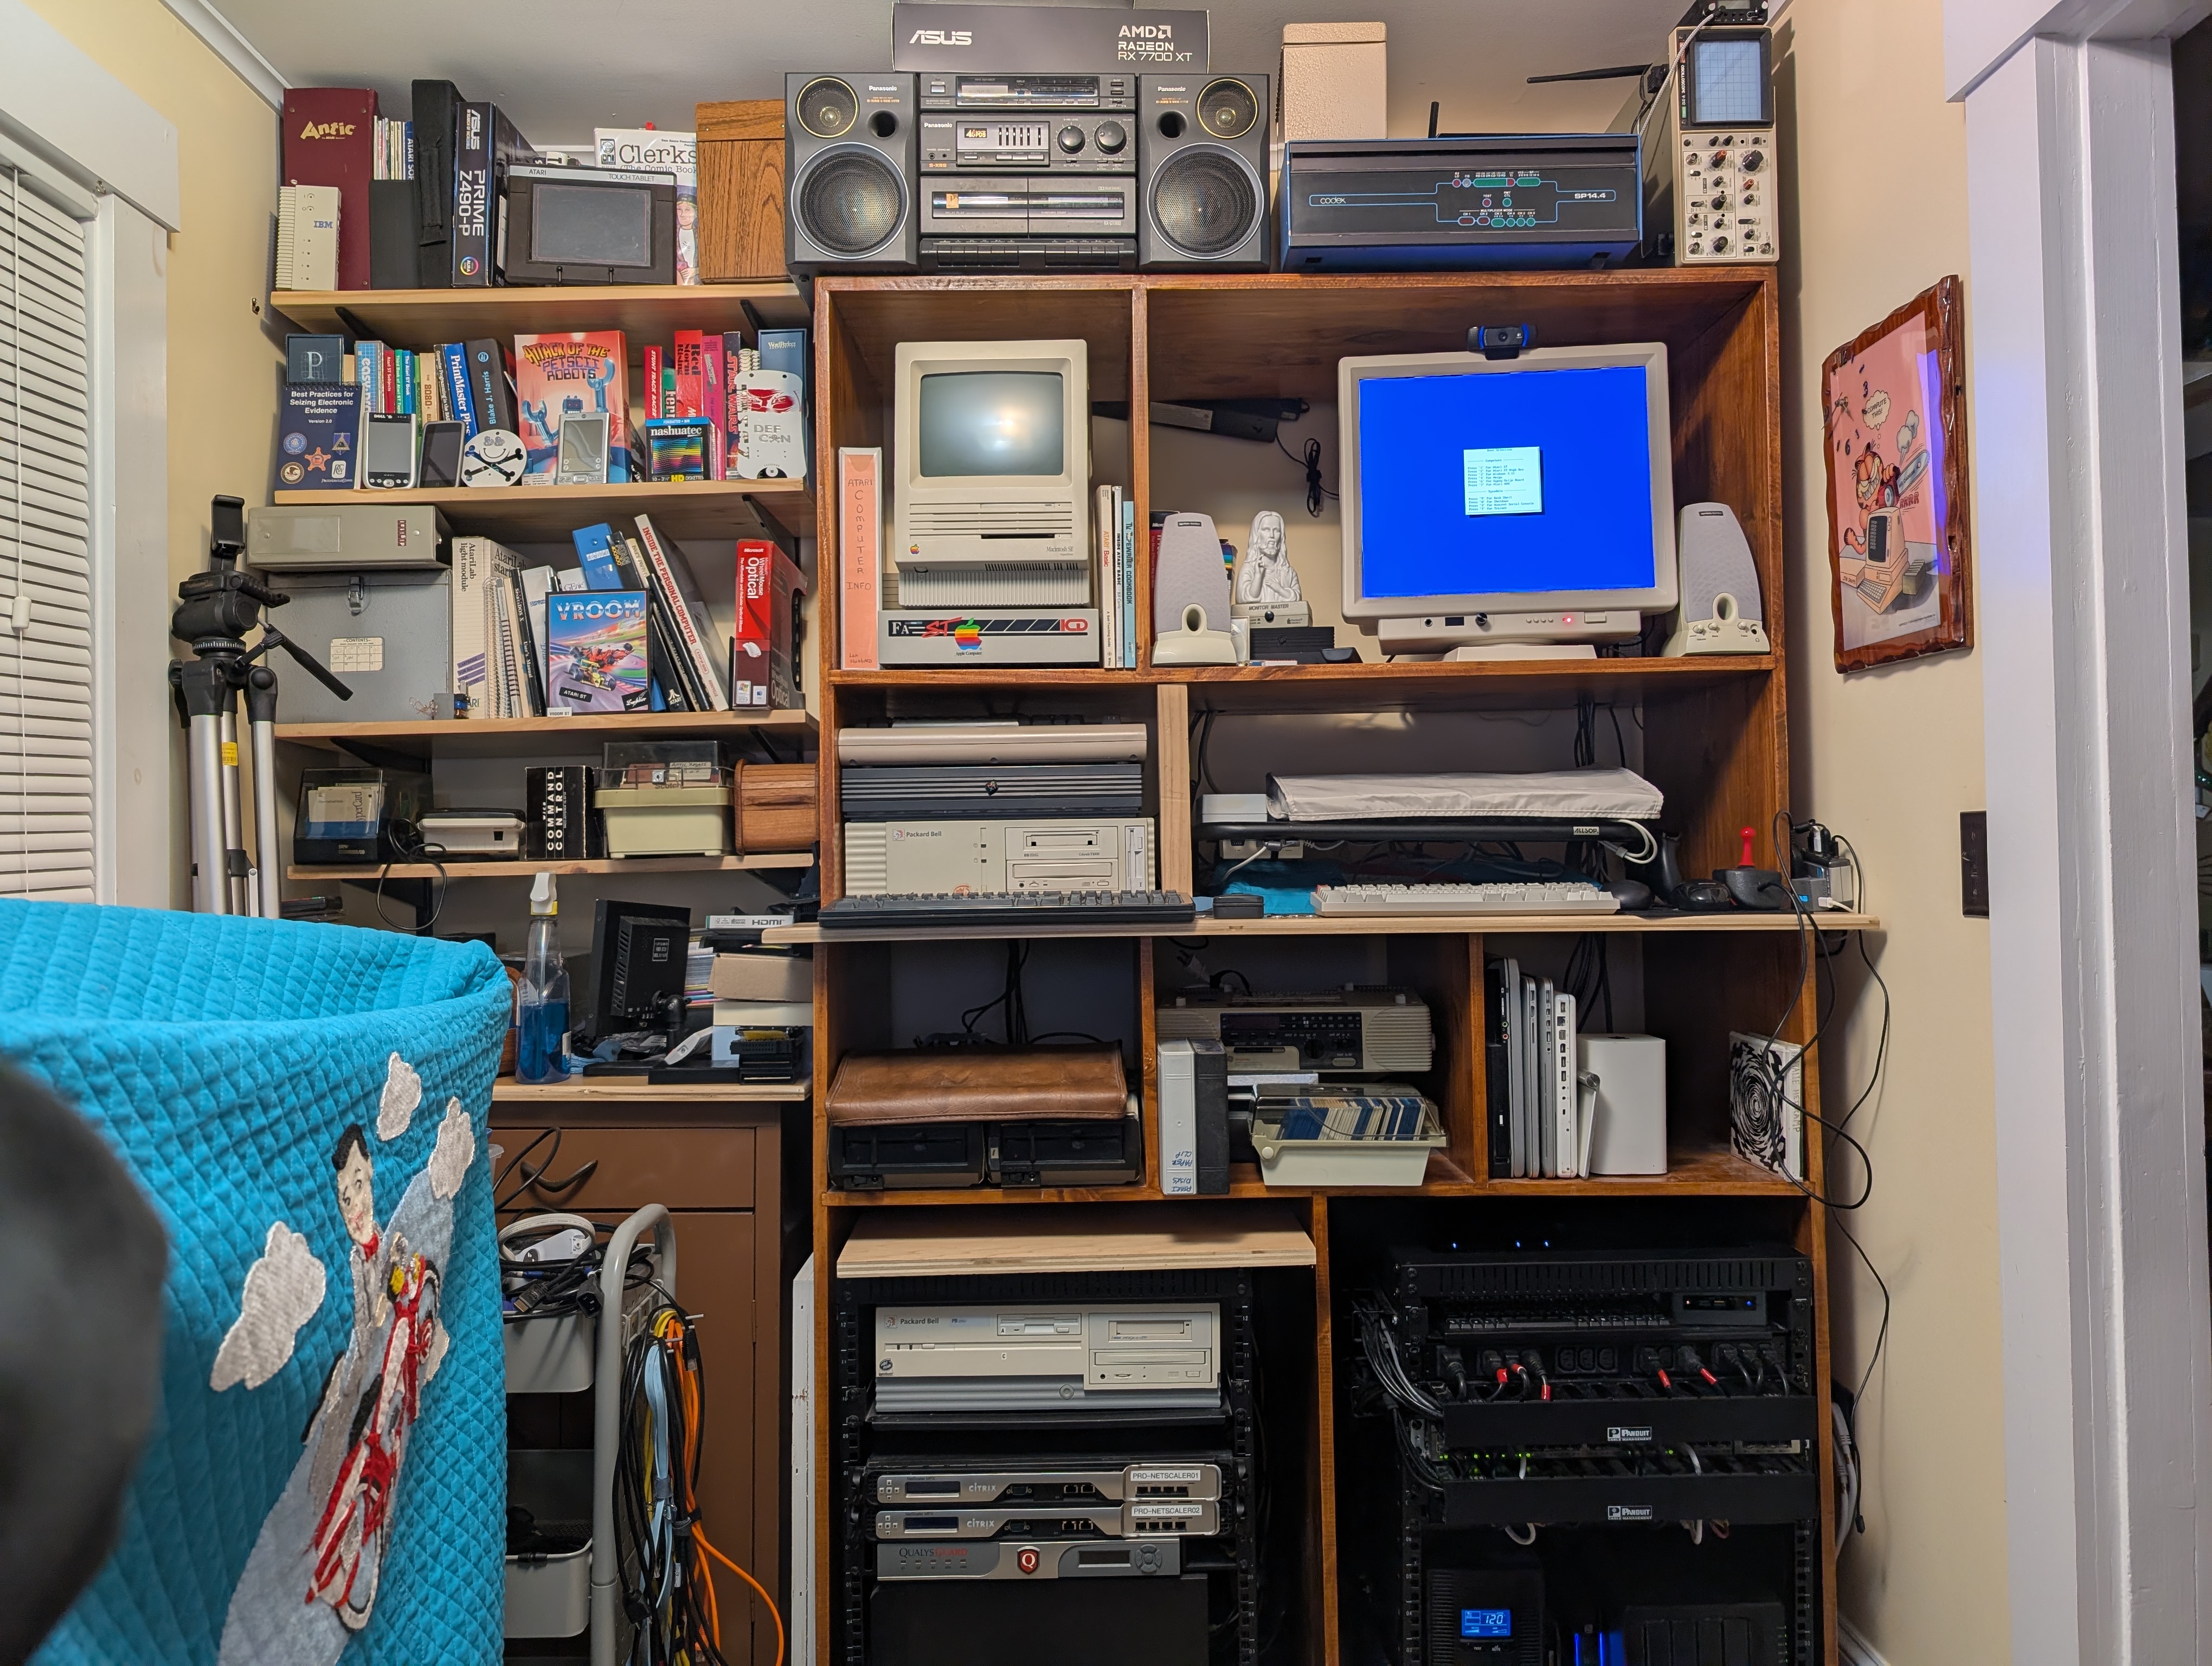
I'm building a shelf in this cubby to hold that super un-weildy VGA switcher. It's awesome but I would have paid triple the price for just 5 ports in a row rather than this octopus nonsense. It was $30, what do I want.
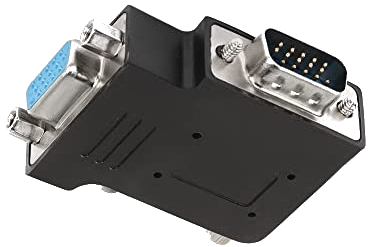
I need to mount that radio too, it looks super cool. I'm also going to make that the home for things like the NeXT VGA breakout box and hopefully the first USB keyboard and mouse dingus they sell. And a bin-full of adapters and "general retro-ey converters and plugs"
So I have this vintage brass and painted woodgrain gooseneck lamp which is awesome looking and so perfect for exactly what I need it for. Imagine sticking like a flashlight on its end pointing up vs this thing. But hoo man this thing's going to burn my house down like that bulb gets scalding hot within a minute or two.
These are 12V bulbs so that base has a transformer in it that gets nice and warm but gives switchable low/hi which is nice. It uses GE 1156F bulbs, which are like automotive backup lights or in a garage door opener. So I want like a modern LED equivalent that is going to look warm and nice like this thing but searching I don't think I trust buying anything I don't see with my own eyes first or someone personally vouches for. Whatever it is I'm not buying four of them for $10 without seeing them lit for real with my eyes.
I want the pleasant light qualities of a 60 year old incandescent light bulb made for one of like 2 "warm ambient light" scenarios for this bulb.
I'd pay $20 for a single bulb if I knew it was exactly what I wanted. I'm sensing a theme in this post.
Today was my last day at work, so of course I'm pulling an all-nighter working on projects and building my workflow. I don't think that will ever stop.
*I just got yelled at at 2:40am for pulling an all-nighter right now today. I'm like dude, it's my vacation, and this is me, relaxing on my goddamn vacation! I can sleep in a few days*
This is the desk I sat at for the last 5 years of my job and for two days a week for a decade before that. To be honest it feels weird for the job to be gone and for me to still be allowed in here. This is likely the last photo that will have my work laptop running Gibson in it. I am currently running through every bin and every parts drawer and converting my entire life over from full time network and server admin to ... someone who just hangs out and does projects and upgrades and documentation for a while.
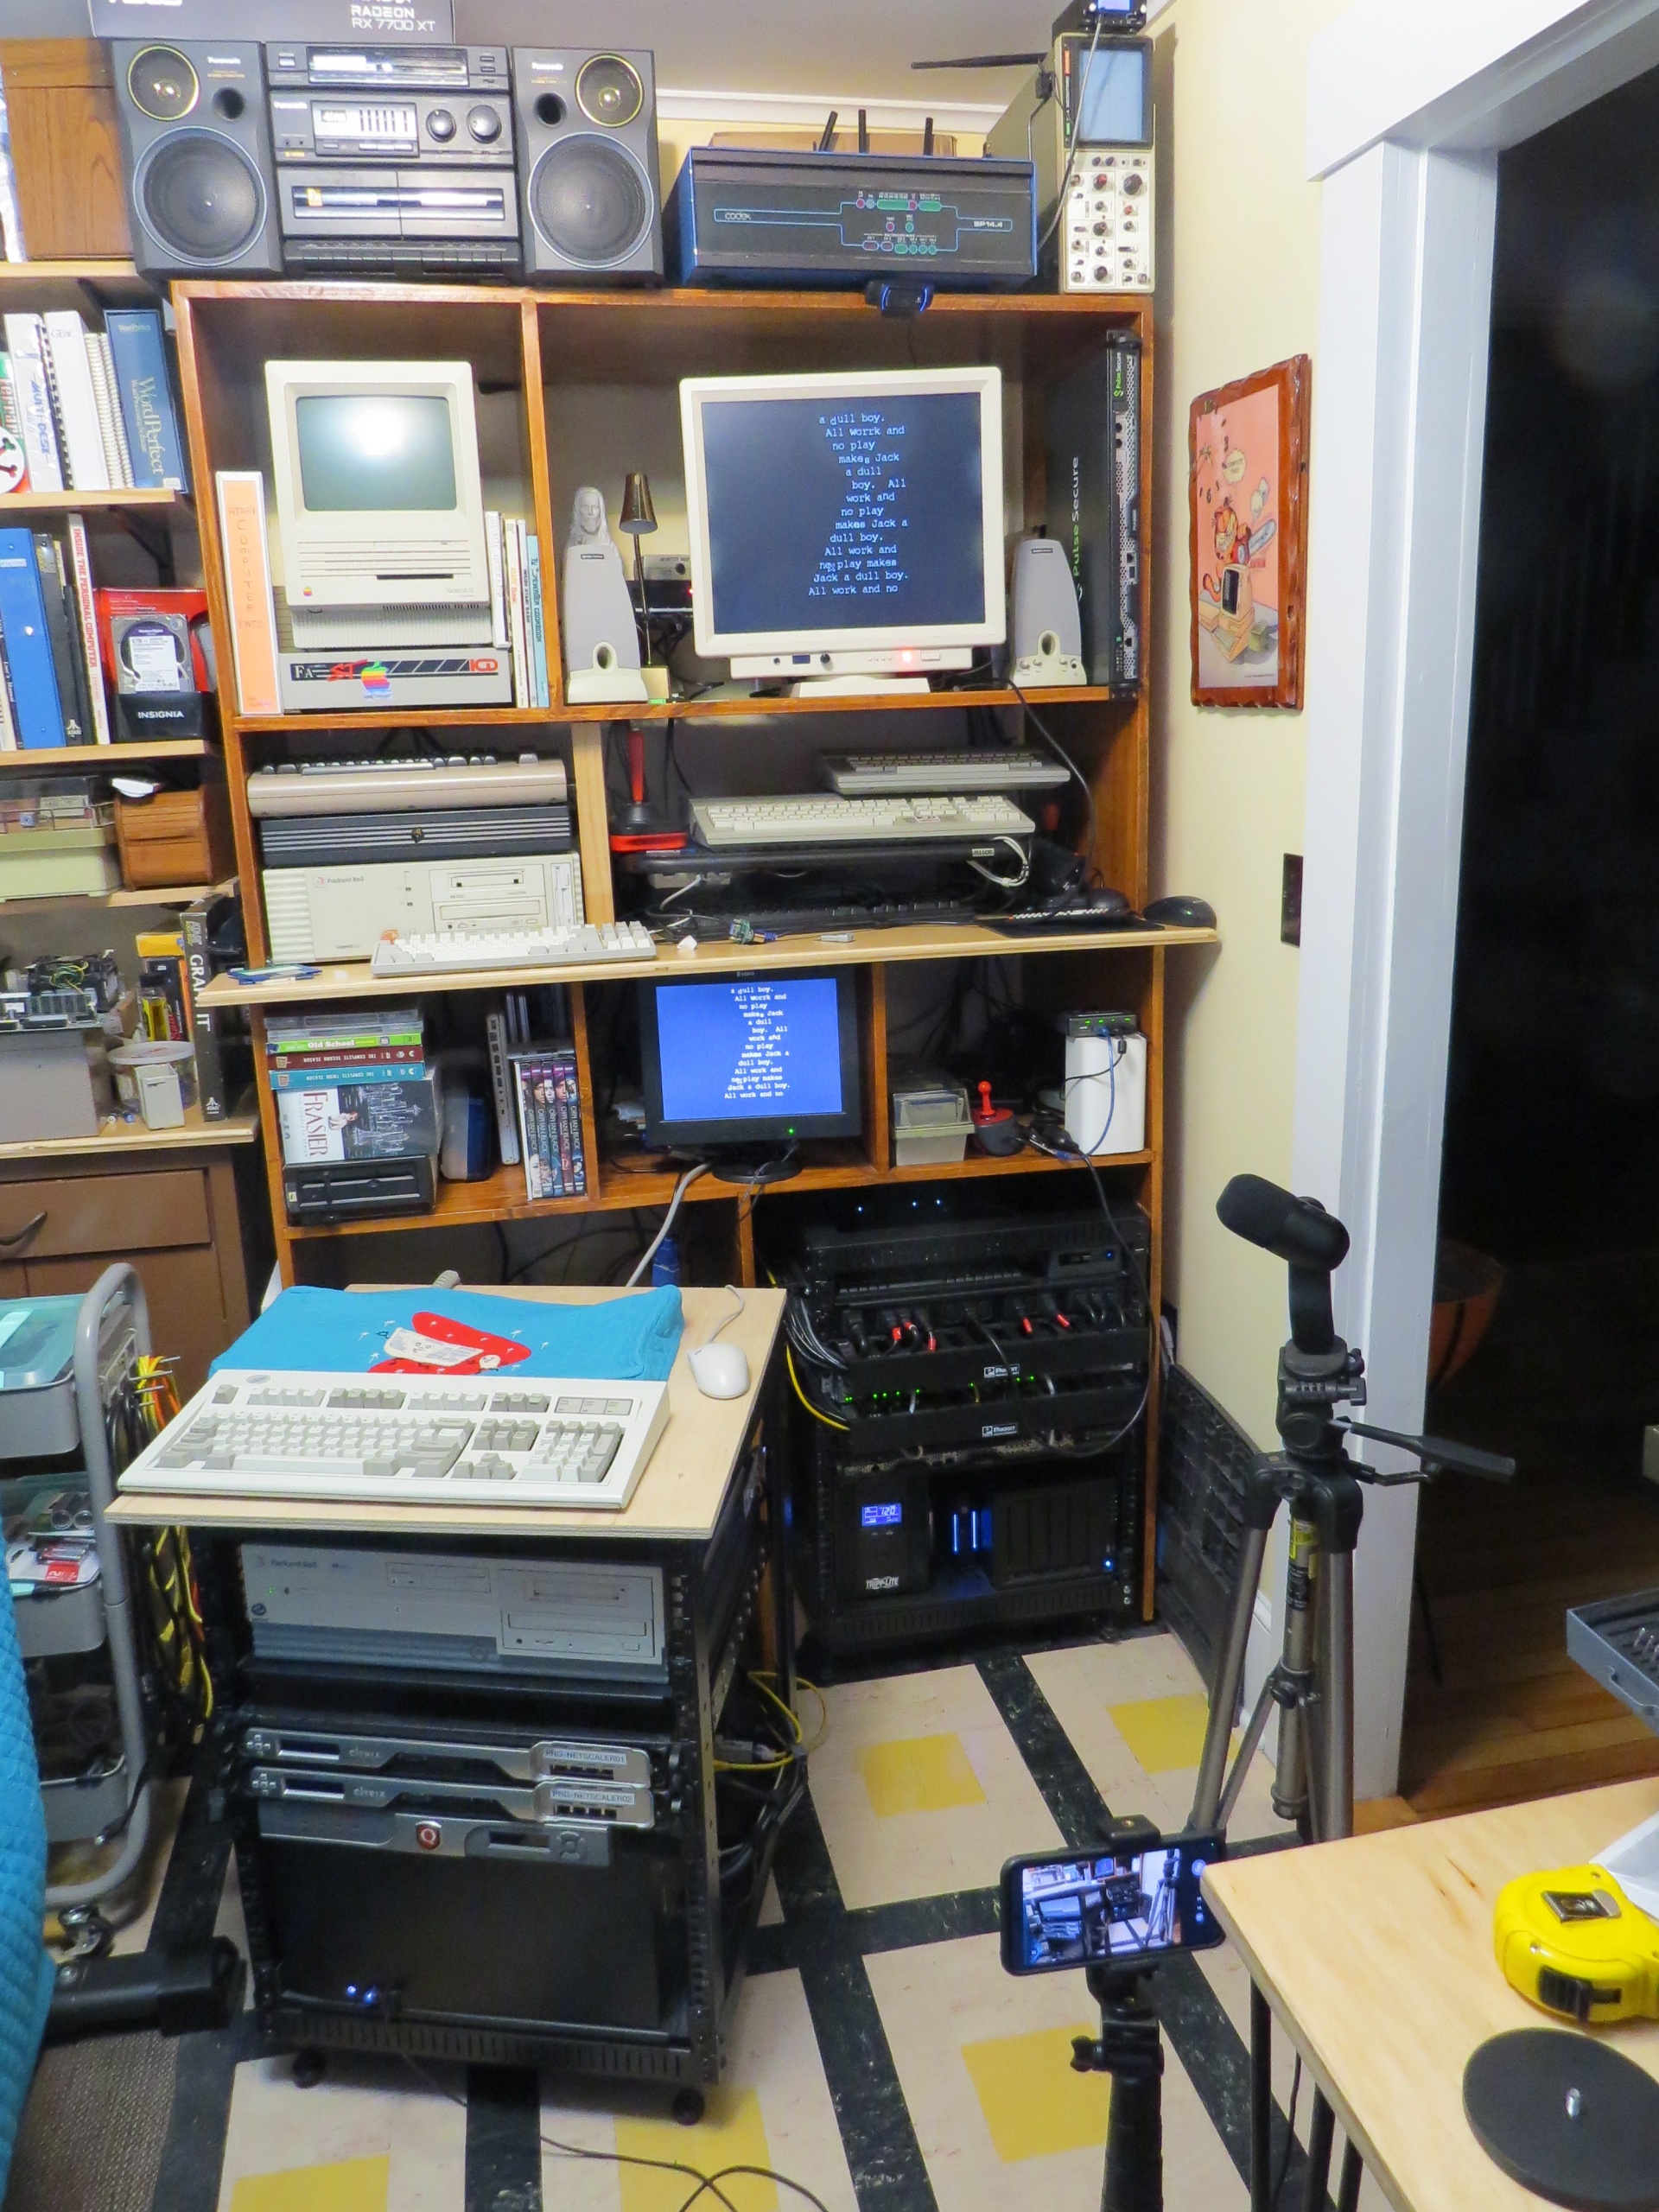
And this is a sneak peek at what I mean when I say "I have a lot of projects in mind for this CheckMate monitor". I'm waiting for one sort-of crucial piece to this puzzle, then I'm going to make an in-depth tour of how I run all of this stuff, from media services to radio broadcasts. I'll be upgrading and making a lot of sysadmin improvements now that I have been freed for a bit. Retro computers are a piece, but are not really the "purpose" of this pile of stuff. My talents lie elsewhere. Fun times ahead as I embrace my inner digital hermit! I will explain why that is a good thing.
The Disposable Heroes of Hiphoprisy - Television, The Drug of the Nation
For a year now I've had a Checkmate 19" 4:3 aspect ratio monitor, and I want to show how that's getting used. The reason I kind of sat on it for so long is that I got frustrated, then depressed and spiraling, and finally decided to fix things and spend myself out of my problems. For Health! And here we are, fully working solution, I'm super happy.
I've seen these monitors start showing up in videos from folks like Nostalgia Nerd and Modern Vintage Gamer, but I haven't seen them really exploring it so I want to share some of my favorite use cases. And with my upcoming sabbatical I'm planning on doing a lot of projects involving the machines you'll see here so I wanted to kind of intro everything before I get started on those.
So let's go check it out! (Caveats: I am not comfortable making videos, and I'm not good at it. I didn't edit out many of my "behind the scenes" bumbling because if I have to figure it out, you have to watch me figure it out! Hopefully you find my awkward bumbling "charming")
TL;DW;
The Checkmate is not just a monitor, it's also an integrated electronics project box, 2u mini-rack and hacking platform.
Basically as I said I ran into one or two semi-issues. The 15Khz horizontal scan rate thing on the VGA port was a real bummer and sent me down a hole, but the OSSC Pro worked out great to help solve that, even though I really don't understand that thing at all. It looked like shit for like a month and just through random button-mashing I got it to work great for both mono and color on the ST. Thanks to CTRL-ALT-Rees for the in-depth review of the OSSC vs RetroTink video specific to the Atari ST platform. If I ever get up the courage to do a factory reset on the OSSC I'll try and document exactly what settings need to be twiddled to make this work in my case.
Thanks again also to BackOfficeShow for leading me to the realization that converting ST to VGA was all just a simple passive "hook the wires to the other wires" process which inspired me to do my Monitor Master hack!
Future projects and other use cases
I do want to see if I can hack a GoTek in there to use as a drive on my ST with the rotary encoder in the monitor. That would be about the slickest thing imaginable. I'll probably get a GoTek with an encoder and try to remove that one and use the monitor one instead.
There are 12VDC headers on the backplane board. Can I wangle one to a barrel jack and mount an 8 port switch in here? I have a couple of 12v@1A Netgear GS108T switches and I'd love to see if I can pull that much power and have a little self-contained network. This is pointless. The Pi in there is just on WiFi, but I kinda want to see.
My most recent job ships cases and cases of hardware to healthcare trade shows. Much of the network hardware for the booth and even small PCs for running demos could easily be securely fitted into a Checkmate with the HDMI out going off to a big TV.
Portable industrial control and automation platform as a self contained control station again with several SBCs and integrated network switching
I'm a network and datacenter-ops guy who naturally looks at everything through that lens. If I were building a crash cart or repair workbench I'd love these just to fill with low power SBCs (Pi 3 works great) and switching for a portable KVM, isolation network and test suite.
While they're not "cheap" for a consumer product, thinking in terms of even small-scale datacenter hardware they're an absolute /steal/.
Other Quirks
I did run into a race issue with the Raspberry Pi as well. I think it takes a bit for the monitor to be fully up and ready to receive video as it starts up. At first I thought it might have been an inrush current type thing, but I think it's just that the monitor isn't "up" yet when the Pi starts shooting out video.
When I'd boot the monitor cold there would be no video until I unplugged and re-plugged power to the Pi. To fix that I added a 10000ms delay to /boot/config.txt and it works great:
boot_delay_ms=10000
To give you a sense of the depth of my personal psychosis, the other issue I kind of have is a ridiculous future-proofing one that is bonkers to even be worried about. There are 6 HDMI inputs on this monitor, but only the main one is directly addressable through the front-panel buttons. Using the front panel, you can switch between HDMI-1 and one of HDMI-2 through HDMI-6. To select between HDMI-2 -> 6 you must use the remote. You can kind of see me do this in the video.
From what I can figure out this of course makes total sense. The UI firmware of the panel, like the off-the-shelf stuff that is the same as the EYOYO monitors, knows nothing about the riser card with all those extra ports on it right? The firmware knows about two ports. The external HDMI-1, and an Internal HDMI that the mezzanine card plugs into, and can select between them. The remote therefore isn't interacting with that COTS firmware to do this, but instead it's controlling the mezzanine card to switch the input among the other 5 ports, which is a very neat way to work around that. I mean obviously the firmware can select the riser card ports, because that's where the composite inputs live as well. If I had to guess it "only" had code to handle two HDMI inputs, so this workaround was implemented.
That's obviously a totally rational way to do this, and really the only way you probably can. It's awesome. My "planner" brain is just saying well, what about in 30 years when that remote is dead or lost. How do I select those ports?
For all I know I can control that mezzanine card totally in code over GPIO from a Raspberry Pi, or serial, or LIRC (which this probably is). Who knows. That's Future Guy's problem. I haven't even dug into that, but I certainly intend to! I want to see just how far I can push this.
Greetz and Links
Checkmate1500plus.com for making an excellent project out of total engineering passion. Excellent work all around to Steve and Appy and the rest of the team!
BackOfficeShow.com for showing how easy it can be to convert ST to VGA and switch between mono and color.
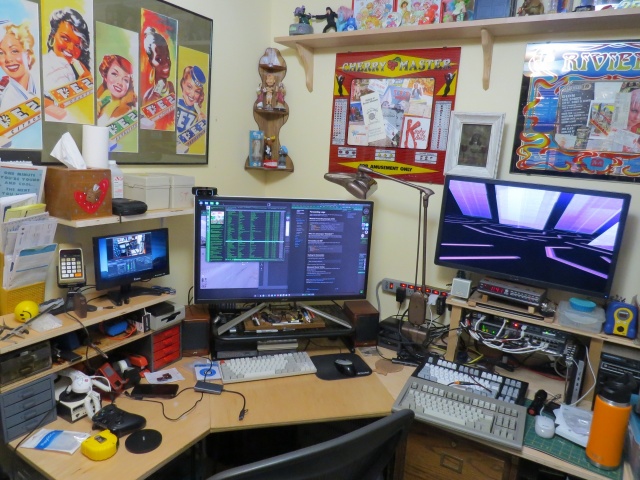
I made a quick tour video for an audience of about four. Here's a brief look at the basic stuff in my office, much of which I will do better quality videos about soon. Maybe like a monthly VAST/SPACE meeting? I dunno.
Enjoy the 1992 aesthetic. Pretend it's a VHS-C tape or something you found at Goodwill.
Update: I didn't notice the screensaver during the whole desk part until uploading just now and it's my favorite thing ever.
Sinéad O’Connor - Jerusalem (AKA the nice lady who was right about near every goddamn thing)
I'm running this setup to backup some Atari ST 720K floppy disks I have. I'm interested in backups of BBS newsletters and general BBS/Early-Internet ephemera from the '80s and '90s and I'm finding cases where at a glance I can't find that specific copy of like STReport or whatever on the Archive. Also anything fun related to the specific Atari club we were all members of since this is likely the only copy of any of that.
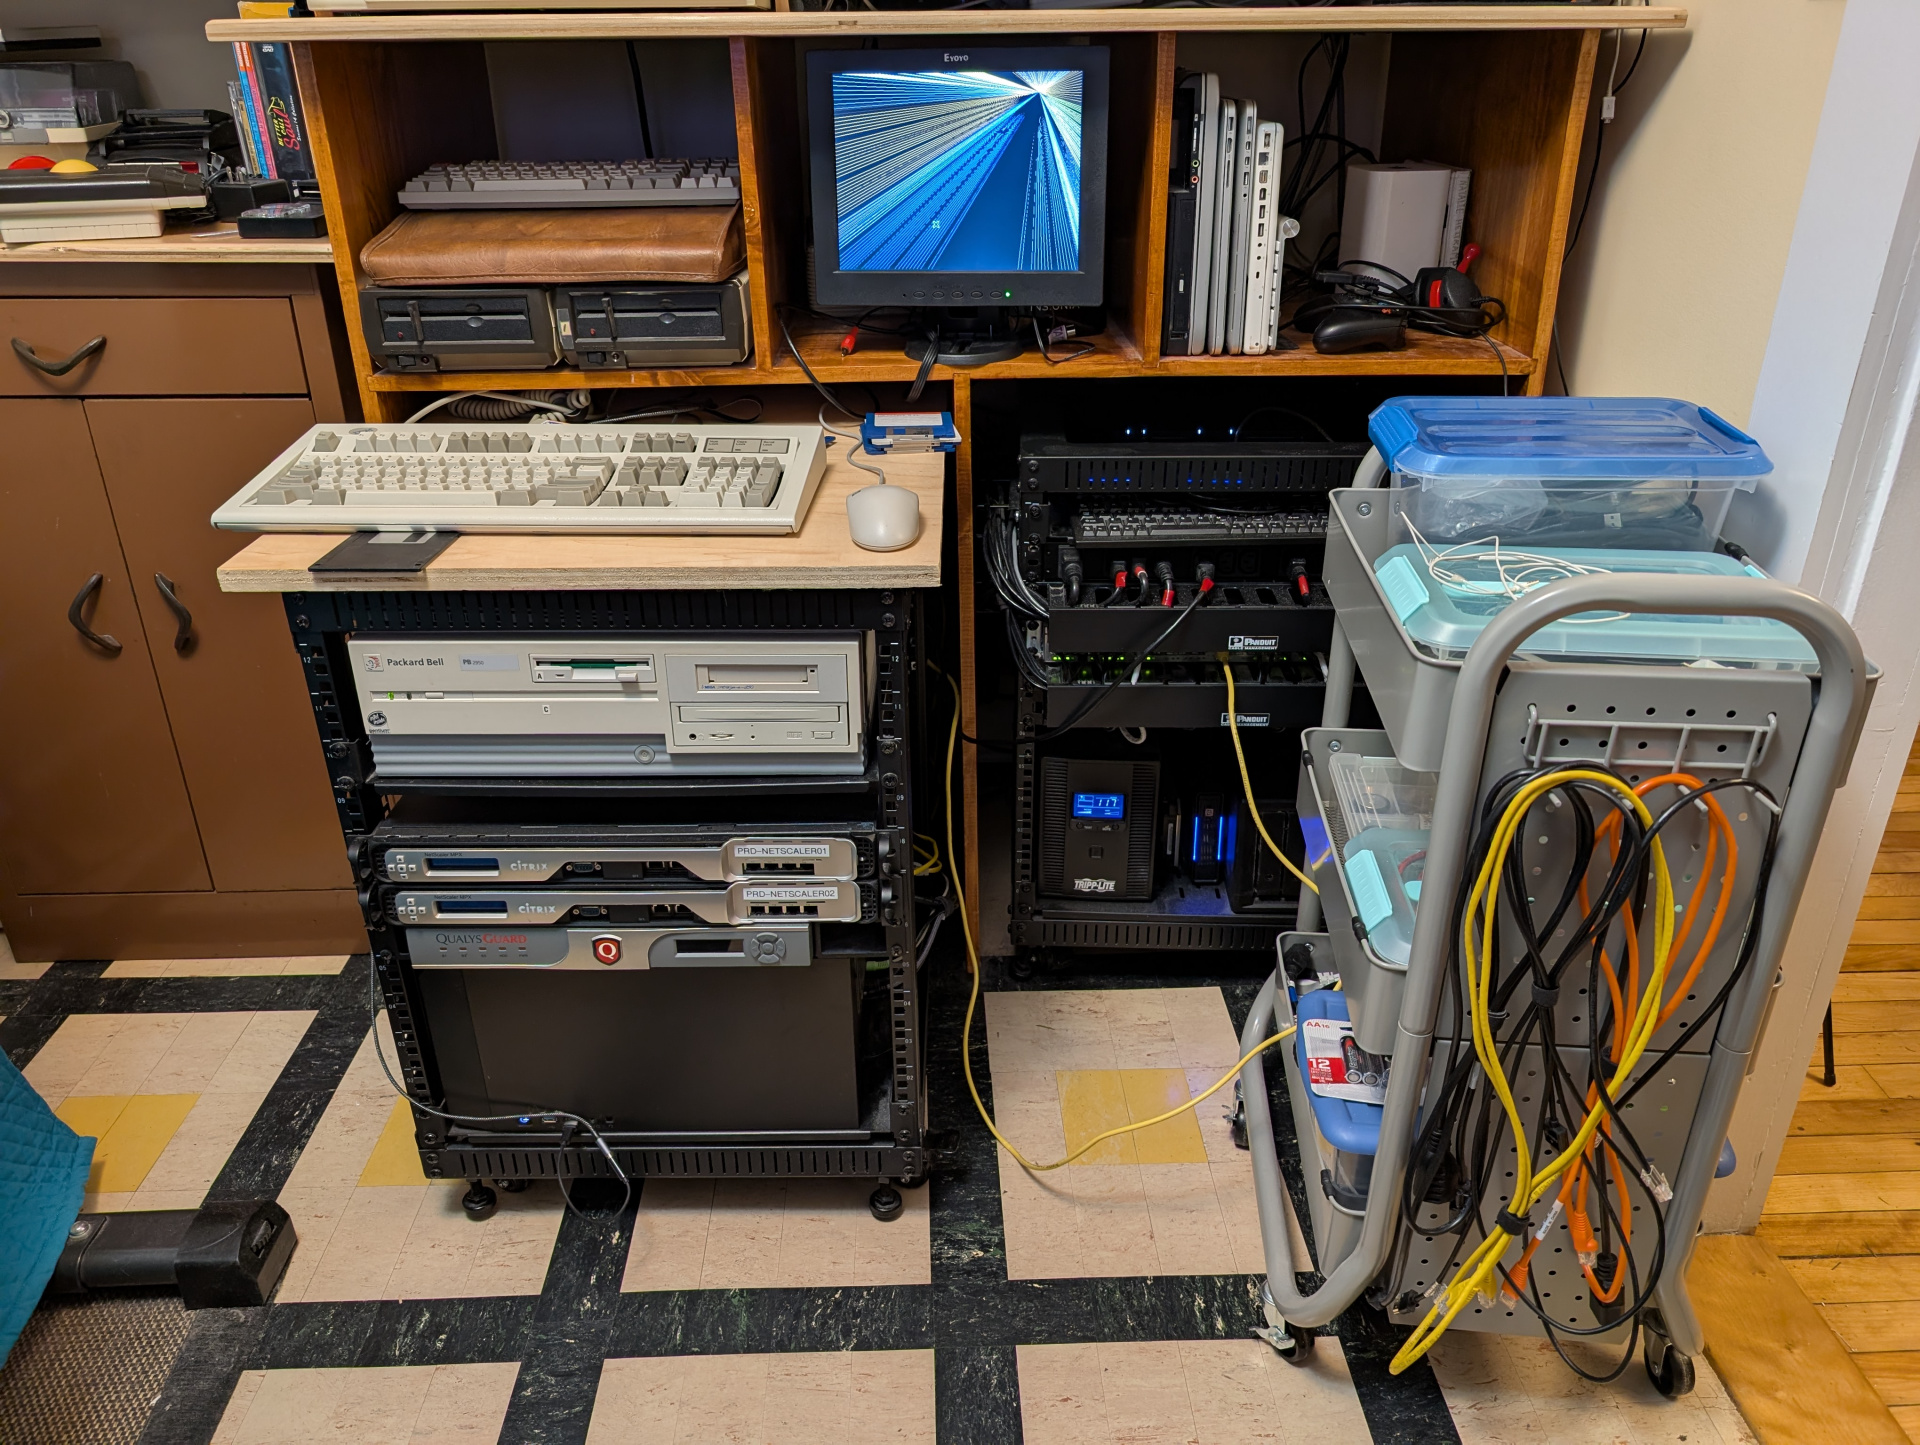
I'm very happy with the roll-away desk surface on top of this rack:
My friend happened to give us a 4 drawer grey parts bin so I decided to build some shelves and an easier to reach space for all the day-to-day rack screws and fasteners, Velcro, dinguses and connectors and whatever.
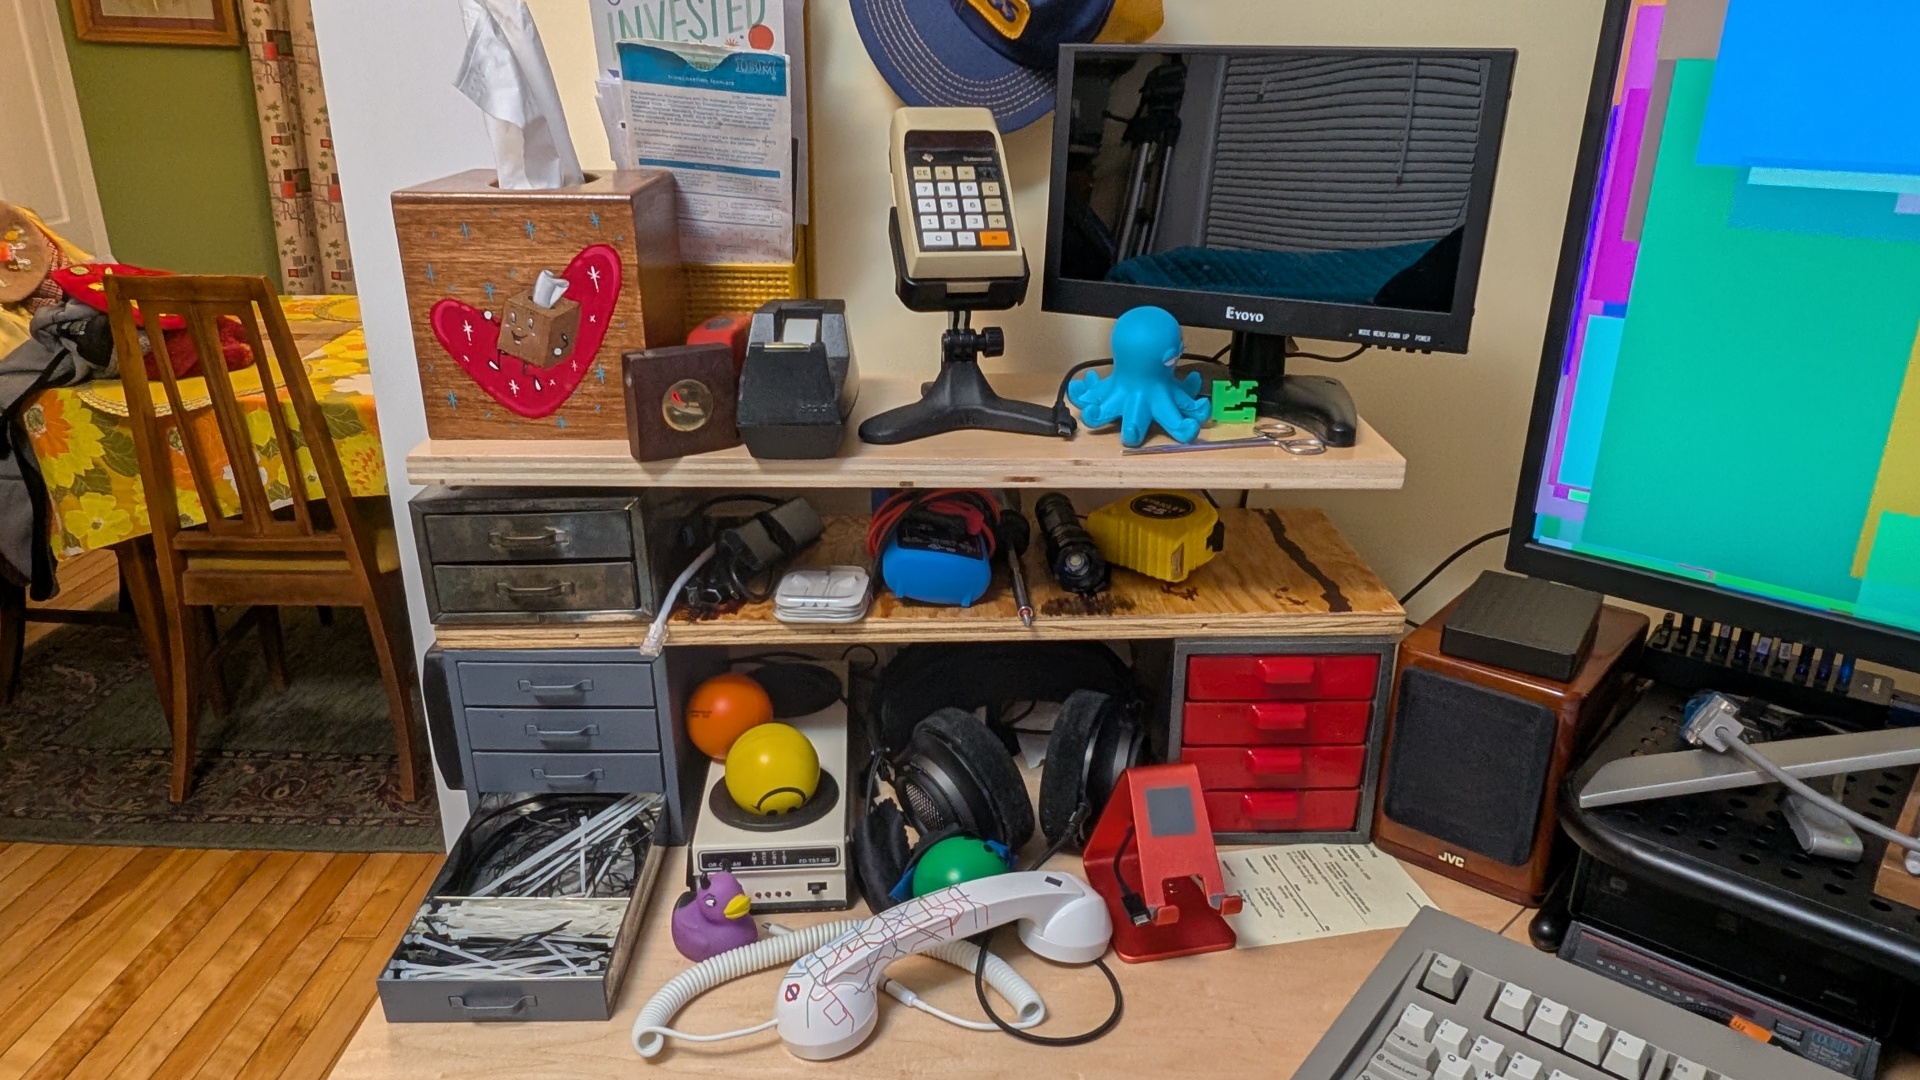
I'm transitioning my mindset from a fully-stocked laptop bag ready to go with all my stuff to that of a more stationary workbench because I will rarely have to just "get up, grab my bag and go" like I could have to do now. I can even just reach that TI calculator and do the calculation faster than I can go to the KDE menu and launch kcalc on the rare occasions I need it.
The answer is absolutely almost never "zip ties or twist ties". That's why the top two drawers are just Velcro.
This on the other hand is just over the top wasteful storage hubris:
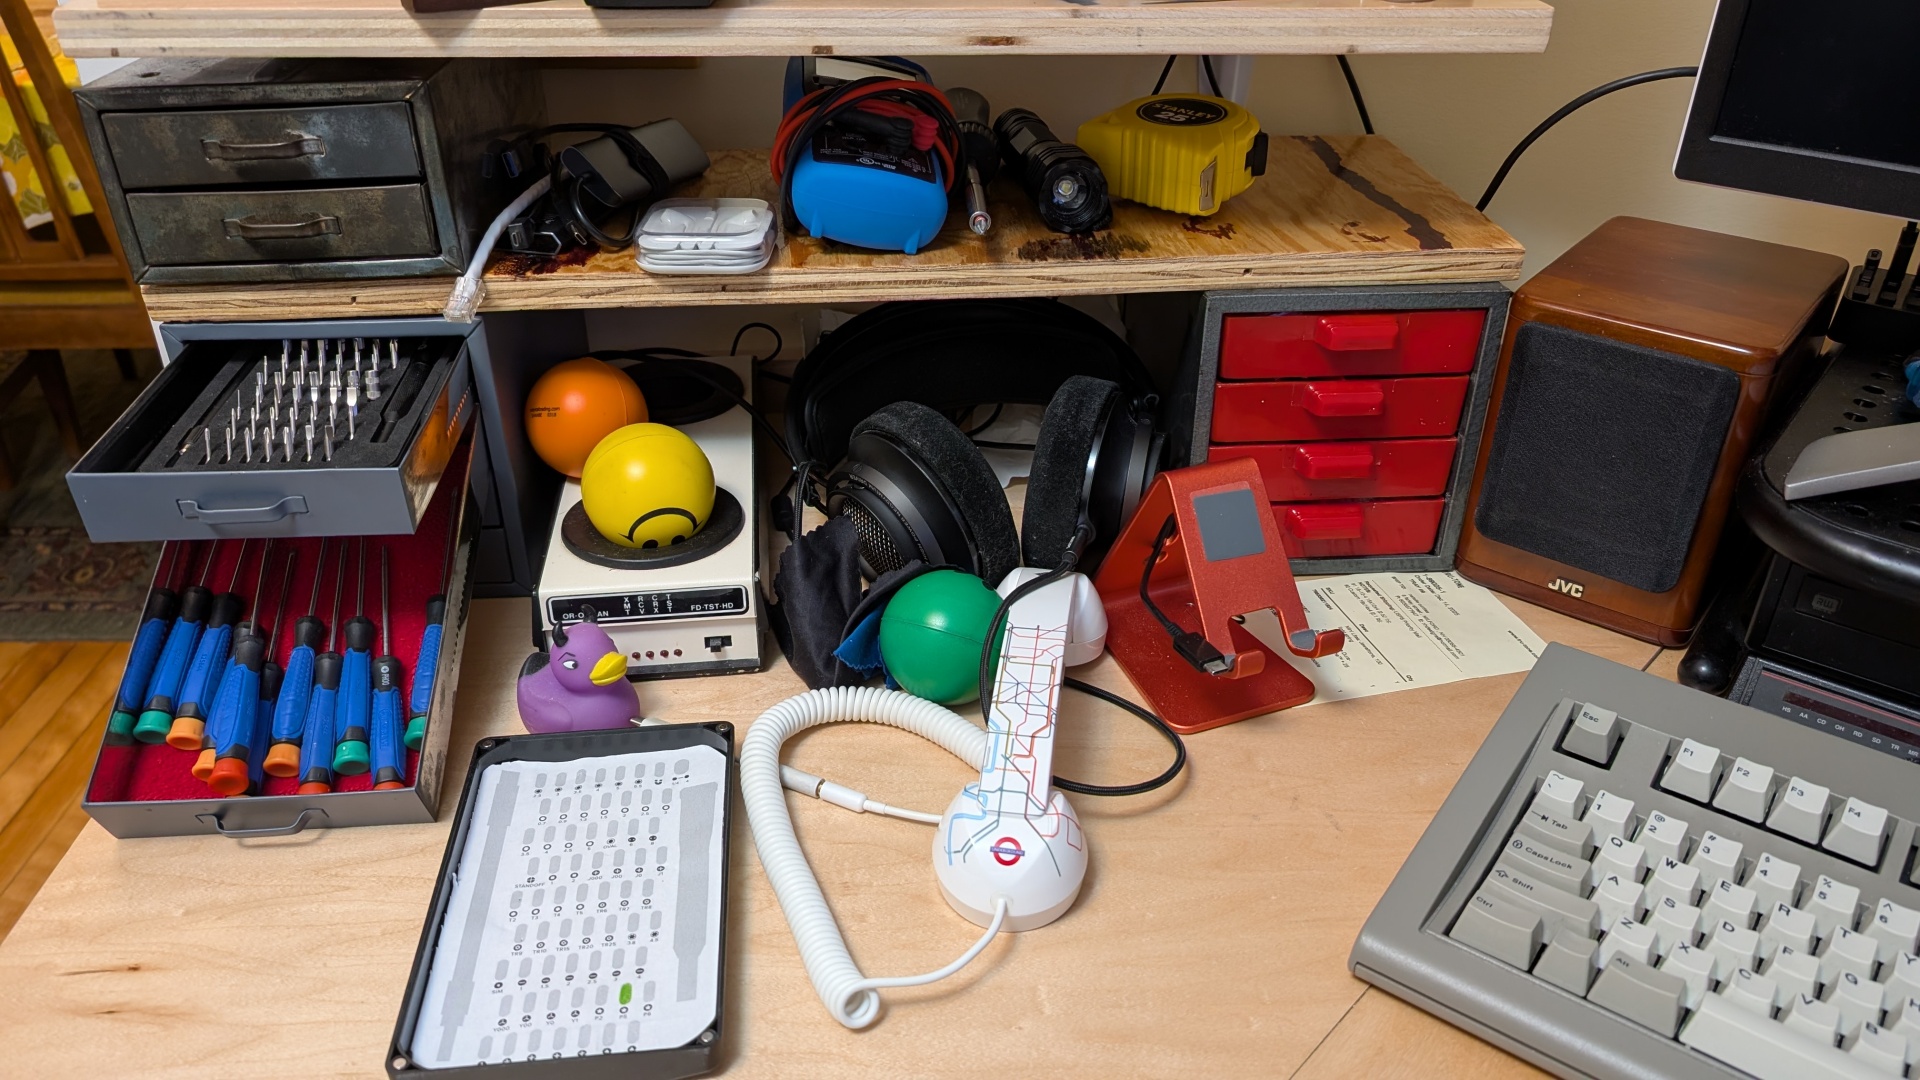
Unfortunately the drawers are exactly too shallow to have the cover with handy glued-in map on the iFixit kit, but luckily it sticks to the side just fine. You know iFixit has PDFs that print out to exactly fit inside this screwdriver kit, right?
I'm going to be working on making a few videos about how my office is set up and fix some problems with some of my machines and stuff as I polish this all up.
This was shot as I finished cabling in my in-rack video capture and face-camera. So I'm doing a quick dry-run of a couple of features of the machine I built that lives in that monitor. It's a Raspberry Pi 3 that I have configured with a menu to emulate every other object in this rack as well as manage and maintain my home servers as a KVM for all that stuff. It's connected over serial to an Avocent 16 port serial console. So from my main menu I log into that serial console and then I use that to connect over serial to my main webserver in the rack below.
After logging back out of all that I am launching the Amiga emulator for a quick run of Nebulus.
Here's what that end of the room looks like. My main workstation that's getting all the video is in the bottom of the left hand rack. Then the right rack is all the network hardware, storage, servers and stuff.
I've mentioned my general goals for this ST. SCSI enclosure, disk imaging, Spectre GCR and stuff. But there's a lot I'm doing behind the scenes like how I had to build the Practical Solutions Monitor Master hack to get video working.
One project I'm working on is documenting everything we have and I'm making internal Wiki pages for each of these items as I go.
My Atari to-do list is pretty much a best-of ST gizmos and doodads.
Just yesterday I wrote a whole thing about how I feel bad for sounding like I'm trashing this monitor, when in reality I haven't actually used it as a monitor for more than a few minutes total. I really want to express my admiration for Steve and his project.
After spending a day with the CheckMate I have decided that it's going to change my workflow in a big way and reminded me of the Real Use Case for this thing.